100th Bomb Group Flying Control
2008~2021
|
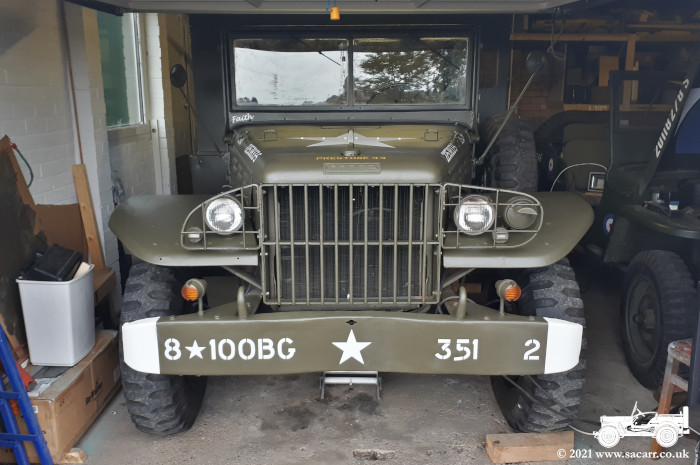
100th BG, 351st Bomb Squadron
2021~present
|
|
|
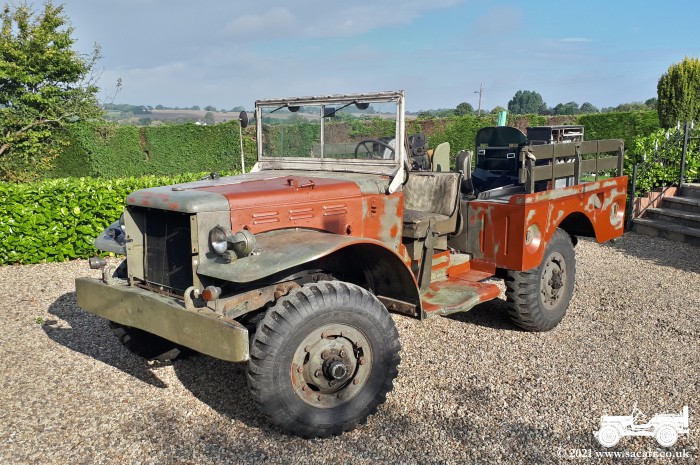
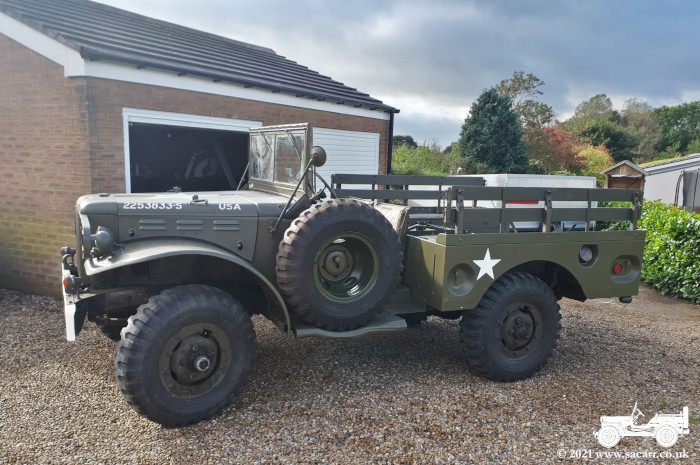
My Dodge WC51 was built in 1944, rolling off the production line on August 11th. The wartime history is unknown, but after the war, it went to Norway, and served there up in the Arctic circle until 1995 when it was retired. It was bought by a Norwegian collector who then sold within Norway in 1999.
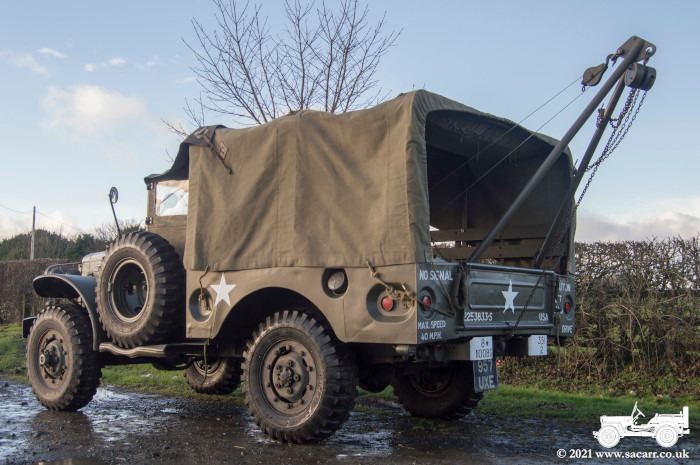
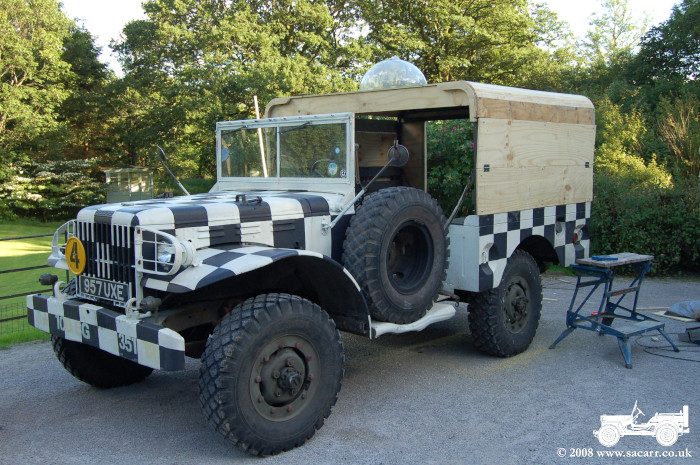
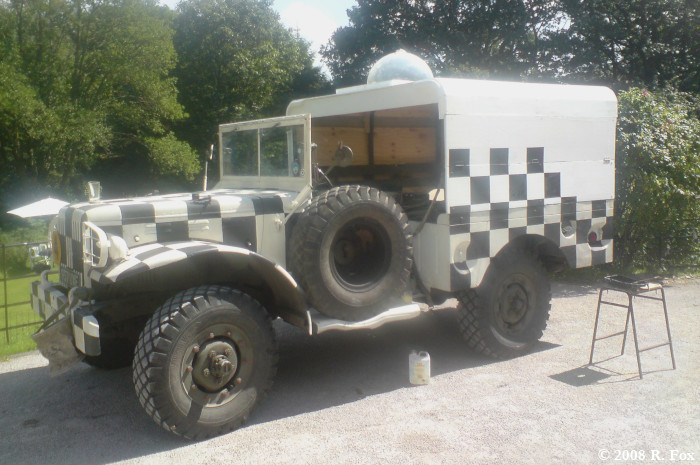
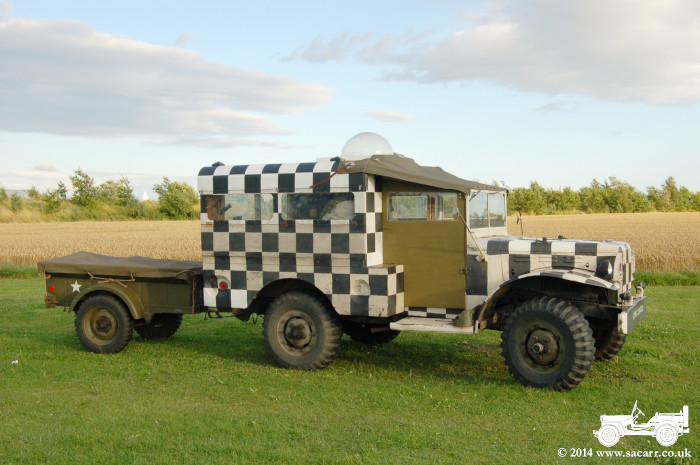
Rupert Fox imported it to North West England in 2005. He kept it olive drab for a few years before starting the 'Flying Control' conversion by painting it checkered. It appeared at Elvington in May 2008, still with the canvas rear body as seen here.
|
The Dodge was brought to our new house in March 2021. The new house had a garage that would be big enough for the Dodge and both our Jeeps, but the garage doors would need raising and widening. We booked some builders.....and waited. During this time, the Dodge sat outside under a plastic cover during the worst of the Spring weather.
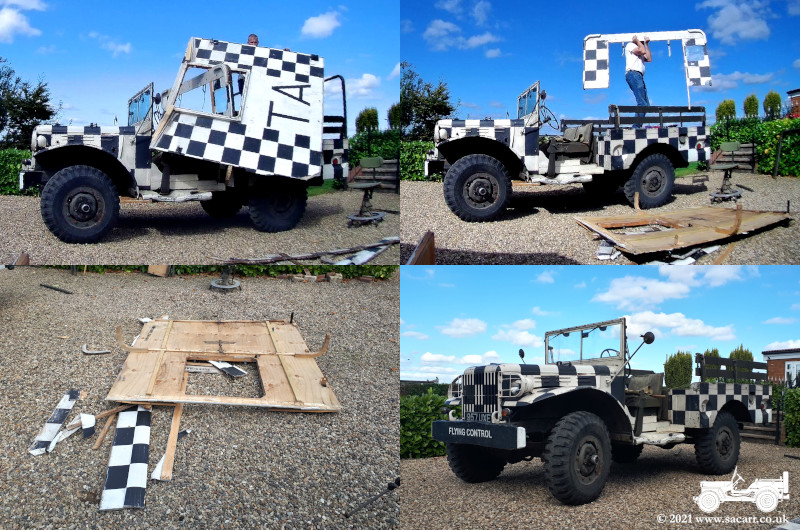
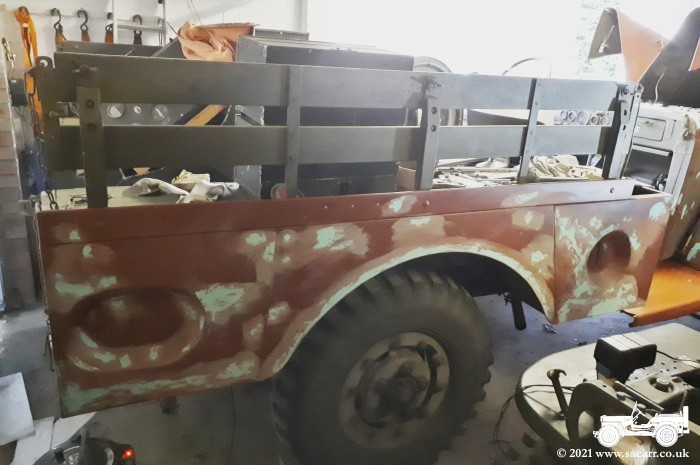
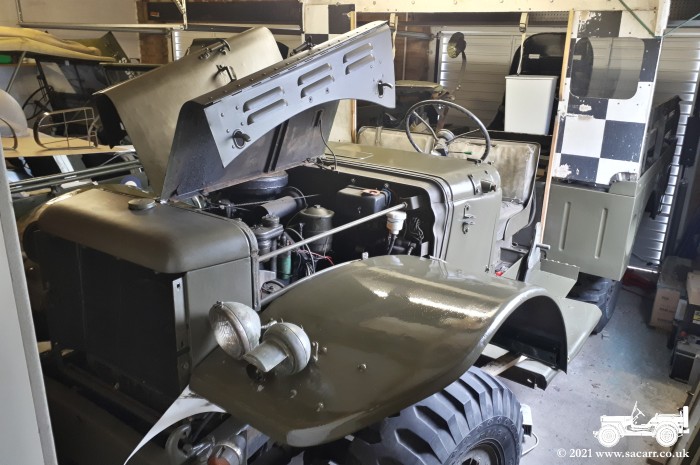
It got to September and still no sign of the builders. I didn't want the Dodge outdoors over winter and for some time, had been thinking about a change. A change from Flying Control meant I wouldn't need the wooden body. Without that, the Dodge would fit through a standard garage door. So on September 16th, stripping the Dodge began.
|
Rupert had fancied a Flying Control caravan to tow
behind it, but the roads around where he lived were less than ideal for that. During the Elvington Show, I convinced Rupert that we
could do an 'Airfield Conversion' on the rear body instead, in line with so many other
converted airfield vehicles. The wooden panels were built onto the existing
bows.

|
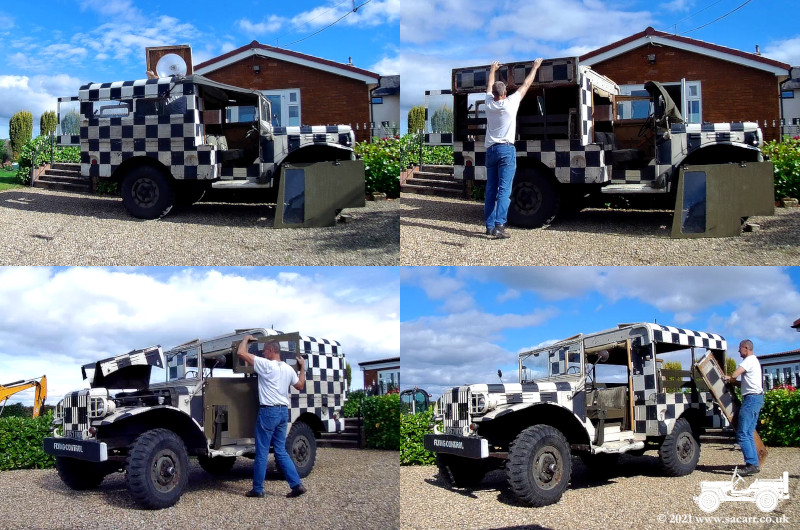
Most of the bodywork was
bolted to the roof bows, or glued/screwed to other pieces of wood that were
bolted to the bows. By late in the afternoon, the wooden body was off the
truck.
|
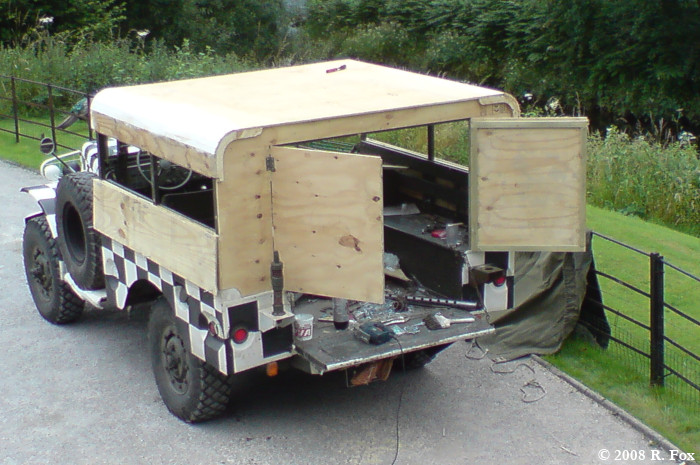
We built the wooden rear body
with fold down sides for vision when driving and removable rear doors. The
shuttering ply, rescued from a skip, had the right look about it for recycled
packing crates.
|
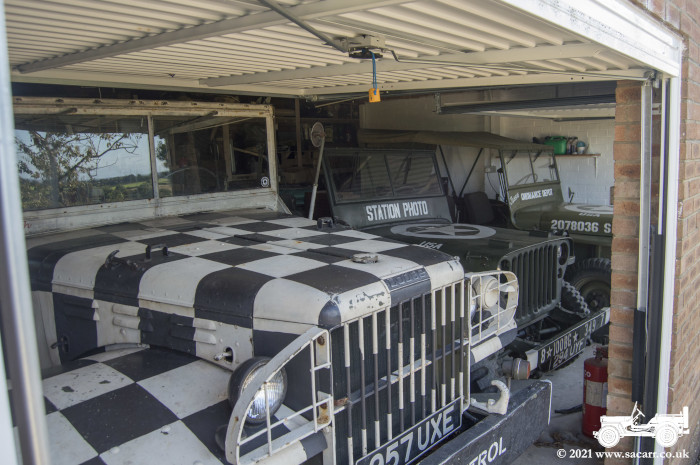
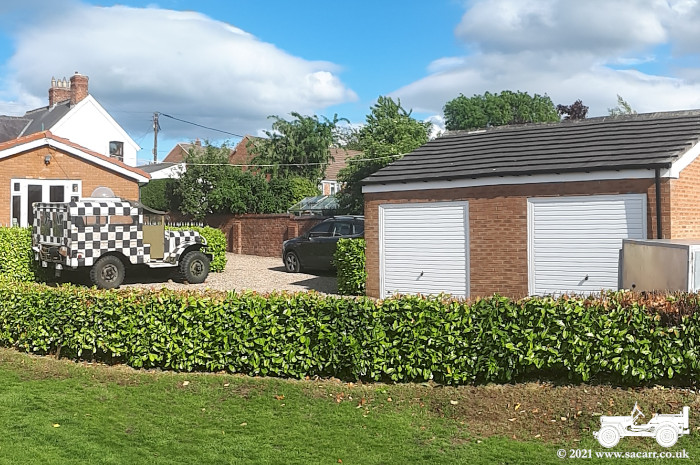
Getting the Dodge through the door was a challenge
as there was only 1/2 inch clearance on each side of the body. However, at
least it was indoors now and out of the coming winter weather. I was no longer
in a rush to get the garage doors modified, though they will still need
changing.
|
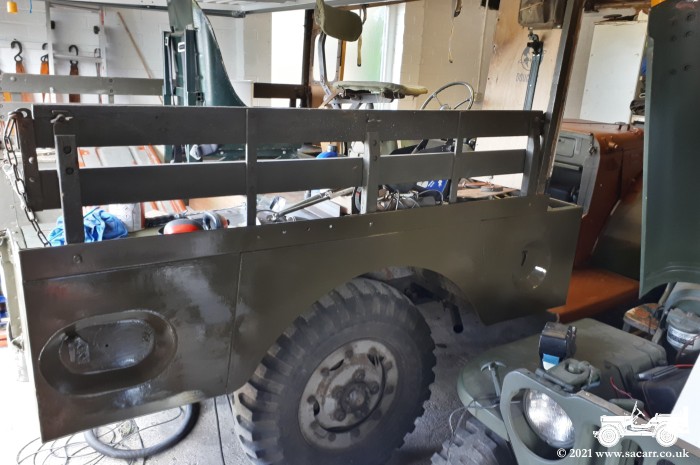
Most of the body work is
complete in this picture, and the sides are seen folded down in the driving
position. The roof now
needs the hole cutting for the observation dome.
|
I was now able to start chiseling off the checkers,
grinding out rust, welding a few areas of rust and sanding down the lower layers
of paintwork. I worked on the left side first, as I had more space to work on
that side. The Dodge was then turned around to gain better access to the right
side.
|
The painting begins. A long job of marking out in
pencil and slowly filling in the checkers by brush.
|
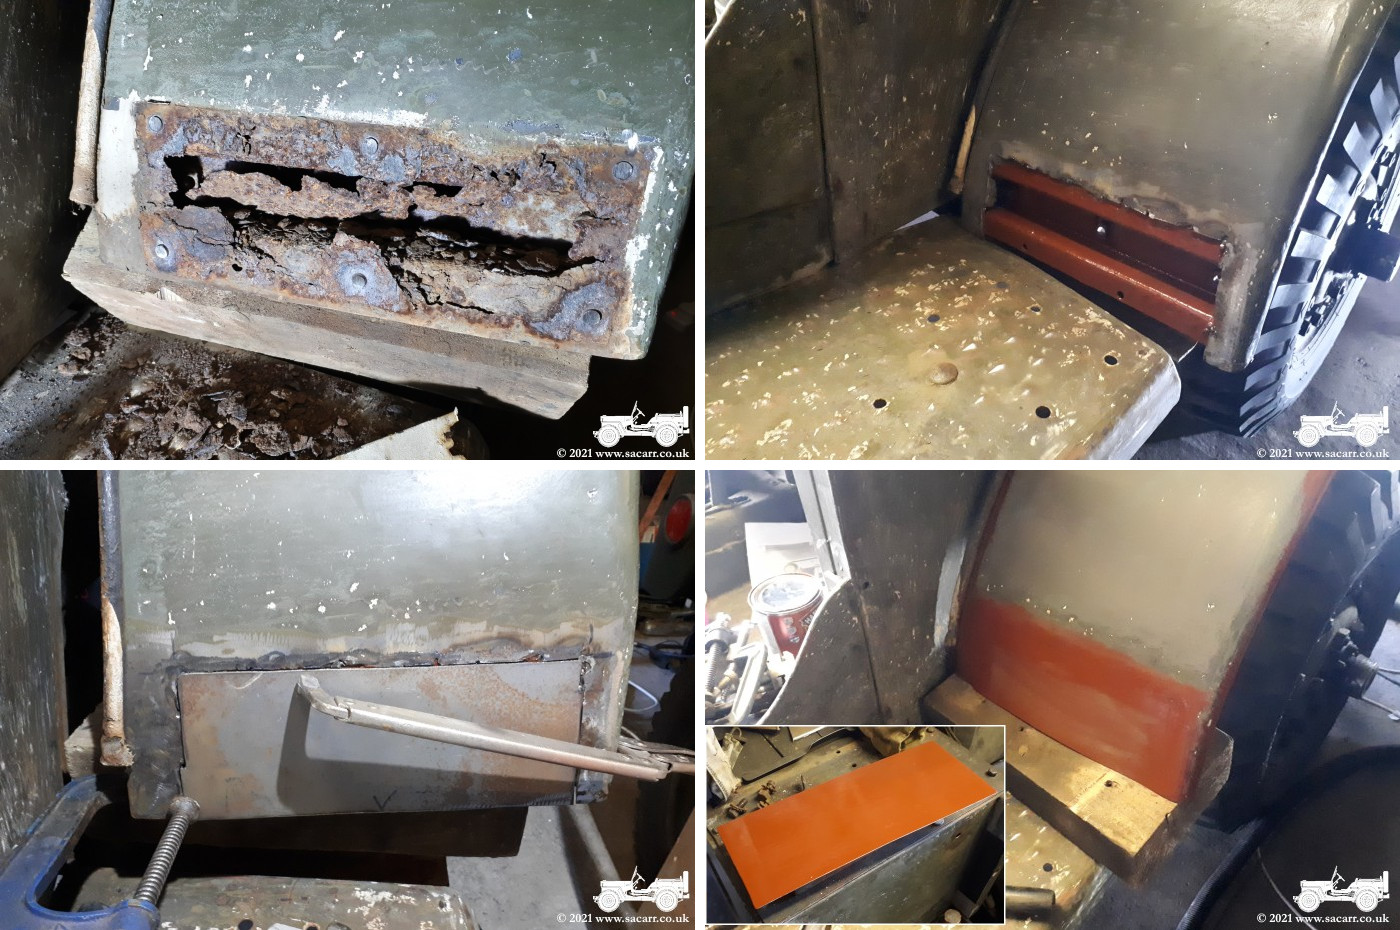
The rear
attaching points on both fenders were quite badly rusted beneath the doubling
plate. New metal was welded in and new doubling plates made to spread the
load. The space between was filled with mastic to prevent water being trapped
behind and starting the rust again.
|
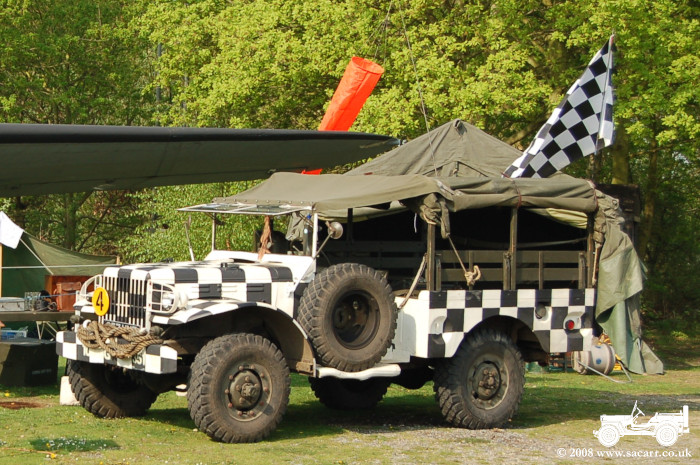
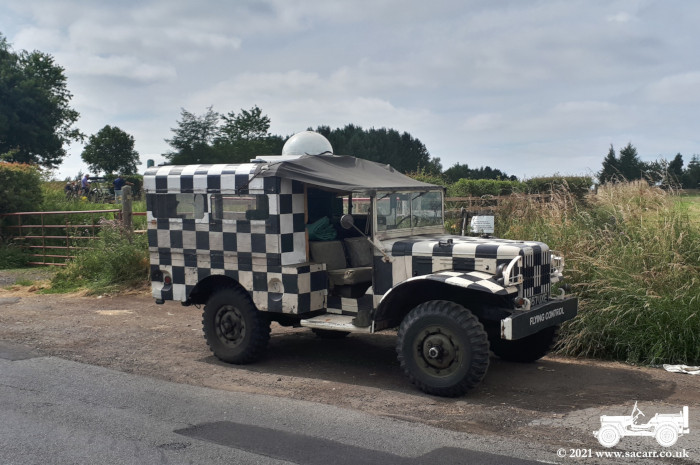
This is how the Dodge looked
for the remainder of the 2008 season. The Dodge remained like this for the following two years, until early August
2010, and it was then put up for sale. I didn't originally think of purchasing
it, but after a few days, I couldn't let someone buy it
and turn it back green, so bought it myself in mid August.
|
The rust pits were ground out, primed and then
filled with a fine surface filler to level them up with the surrounding paint.
There were also a few chisel marks that needed filling, following the removal
of the checkers.
|
AFTER MY PURCHASE
The 'Flying
Control' conversion is ongoing, but one of the first tasks was to add side and
rear windows to the rear body for
good visibility when driving. The spare wheel was moved from the drivers side
to under a false floor in the rear body. This allowed doors to be built for the
cab, a typical conversion for airfield vehicles. These helped to keep the cold
out, especially when my young daughter was travelling with us.
|
Time for paint. I ordered a 5 litre tin from
Jeeparts, as their Very Dark Drab was suited for later war vehicles. I'm not
too keen on the lighter, more brown olive drab on earlier vehicles. As it
turned out, the new paint was a very good match for patches of original paint
found under the reflectors and in the cab. It is seen looking very glossy
below as it had just been applied, but dried to a matt to satin finish.
|
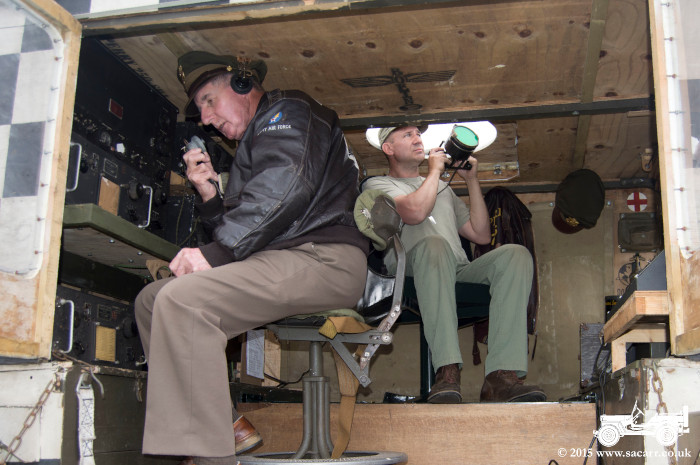
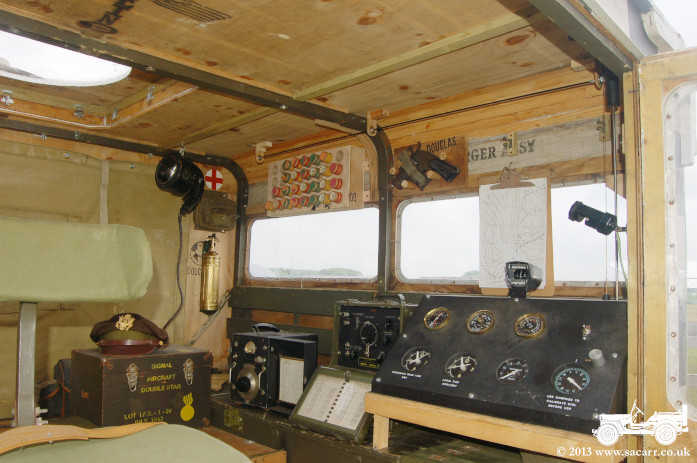
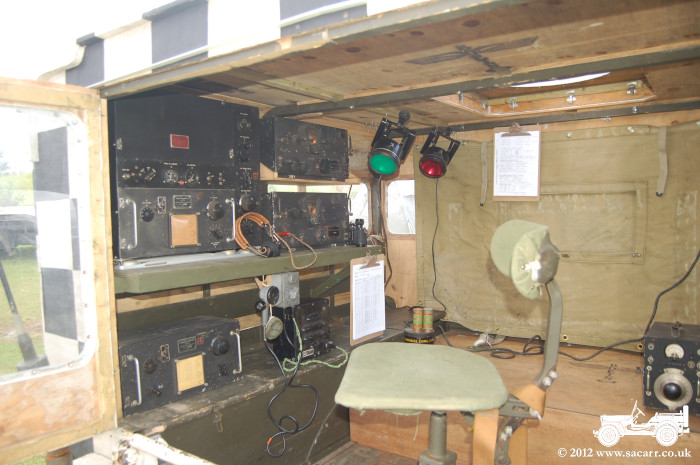
A shelf for radio
equipment was added to the rear left of the body. On this is mounted a BC-375
Transmitter and two BC-348 Receivers. Below the radios, an additional tuner and
signal corps speaker are mounted, while Signal lamps hang from the roof.
|
The fenders were the last parts of the main bodywork to be painted, as I had
been waiting for some new coach bolts to attach the replacement doublers.
|
On the right side, there is a meteorological station, giving wind direction and speed, temperature, pressure and humidity and both GMT and Summer Time or Double Summer Time. Above on the side wall, there is a rack for signal flares and an M8 Pyrotechnic Pistol.
|
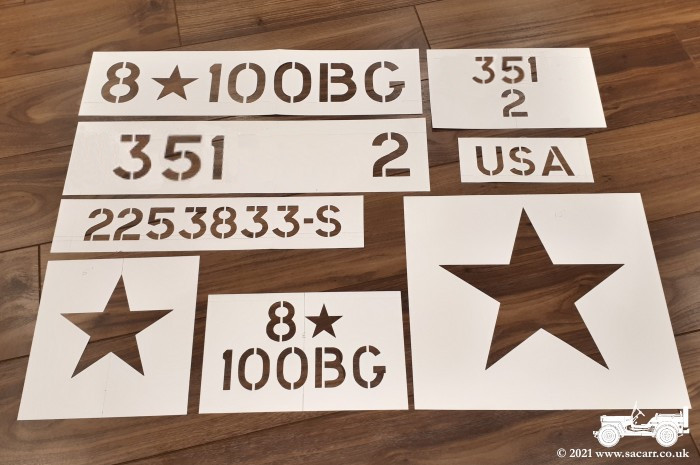
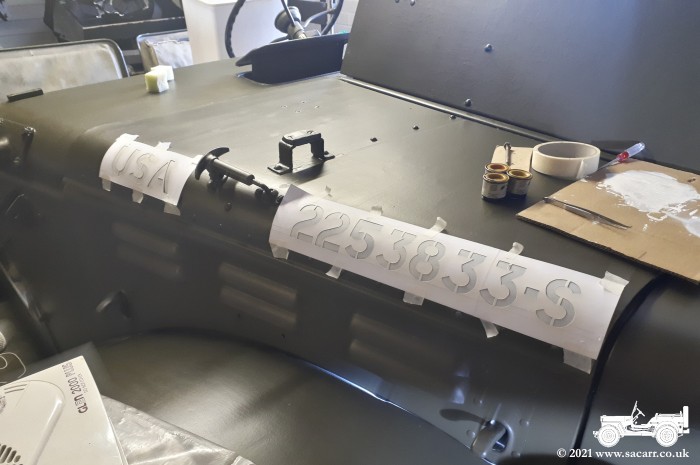
Markings came next and I cut my own stencils using
sizing, positioning and fonts from AR850-5 on marking army equipment.
|
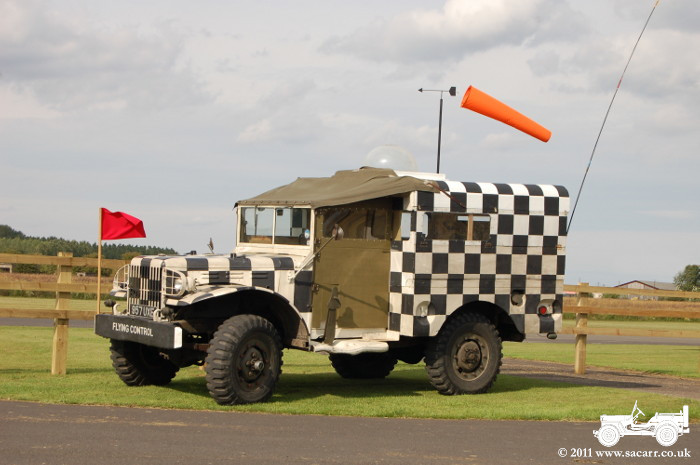
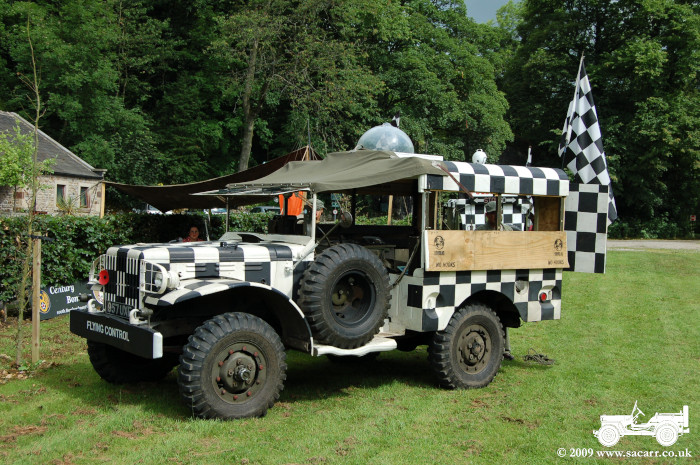
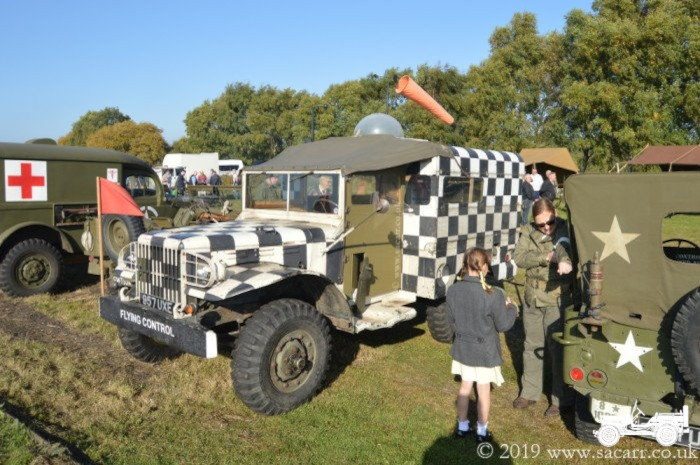
The windsock was mounted above
the meteorological station so its rotation could operated the wind direction
indicator. A red warning flag was added at the front which was a common feature
on vehicles used on the live side of an airfield. It is seen here at Breighton
airfield, next to one of the original wartime buildings.

|
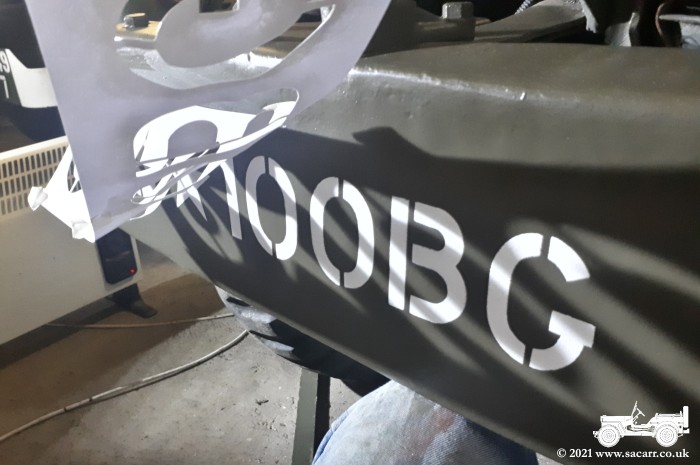
The stencils were taped in place and then the paint applied by dabbing the
stencil with the end of a glossing roller, lightly wetted out with paint.
Keeping the roller fairly dry prevented the paint from bleeding under the
stencils. Around three light coats of white was needed to give a reasonable
coverage.
|
I fitted a 12
volt battery into the front left locker, charged from a 6v to 12v step up
converter. This powers the lights and dials in the transmitter and receivers, so
when switched on, they appear to come to life, despite the fact that many
internal components are missing. While the radios don't work, I have a modern
Air Band Radio which is wired into an amplifier and Signal Corps LS-3 loud speaker.
This now gives me the
impression of sounds of aircraft radio traffic coming through the radio system.
|
I can't be 100% sure of the hood number. I repainted the hood several years ago
and there was no trace of any numbers, not even any primer. So I used the
chassis number and a chart of known numbers, which gave a range of 173 possible
hood numbers to narrow it down. The range all started 2253xxx so the last three
numbers were chosen from the remnants of a number found on the front bumper
during sanding down the paint.
|
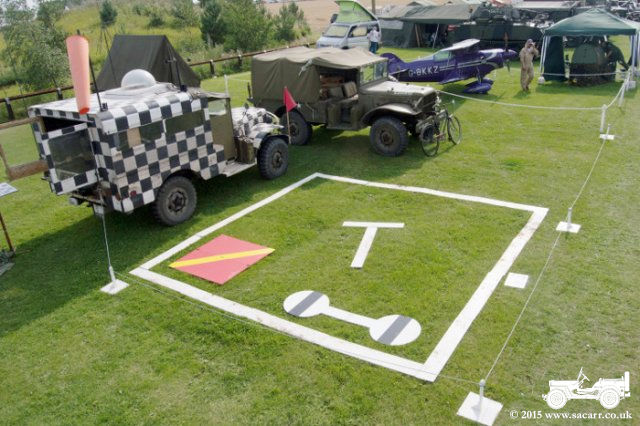
Croft
Nostalgia 2015, the Dodge on display with an airfield Signals Square. This was
scaled down to about half size, the fullsize being 30 feet square to indicate the runway in use,
ground conditions and hazards to aircraft without radios.
|
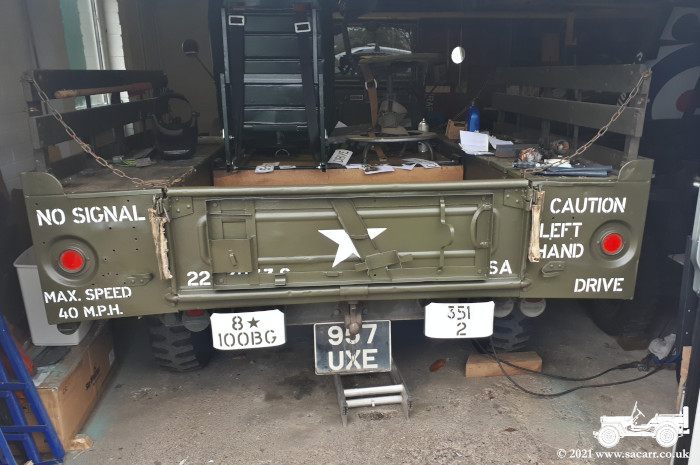
The rear end stencilling was based on wartime airfield Dodge picture. The back
end looks very busy, but virtually all of the tailgate markings are hidden
under the pioneer rack.
|
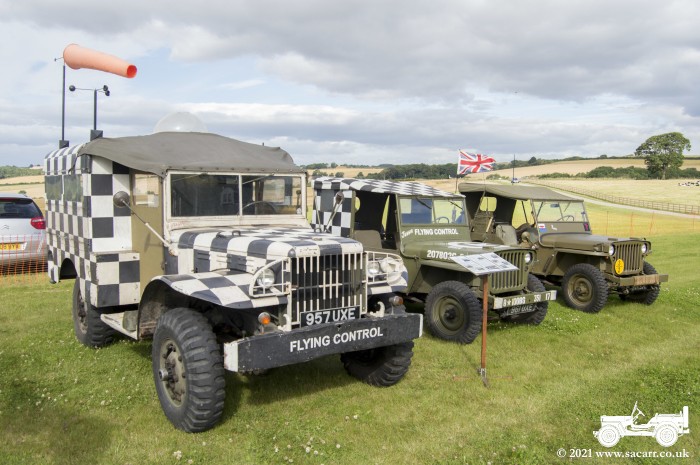
On a few occasions, where the event
wasn't too far from home, the Dodge was joined by our two Jeeps - not an easy
task with only two drivers! Due to the difficulties that posed, having the trio
on display didn't happen often.

|
The Dodge was pretty much complete by October 16th 2021, bar a few little touch
ups here and there. With a dry morning forecast the
following day, a drive was a possibility, though rain was due in the afternoon.
|
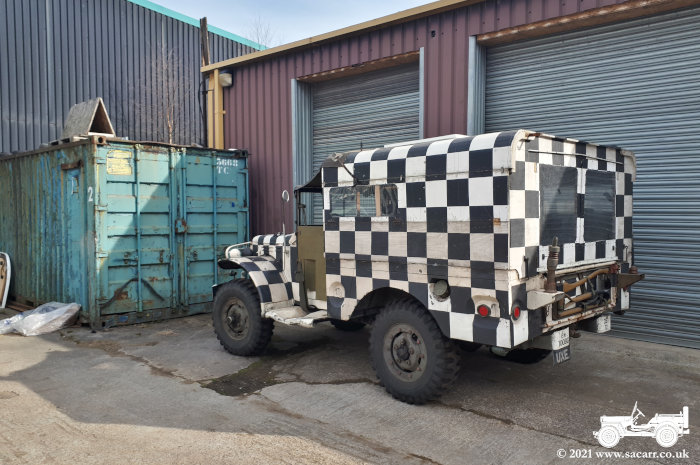
The
last event before the Covid lockdown was at Tanfield Railway 1940's show in
September 2019. From there, the Dodge was returned to its storage container
and then sat out covid on axle stands. It was run occasionally in the
container, with the clutch and brakes exercised and wasn't driven again until
March 2021 when we moved house.
|
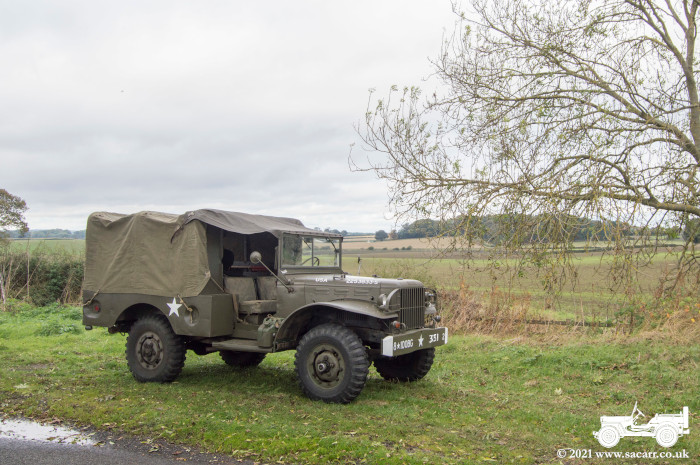
The following morning was indeed dry. Tools and rubbish were moved out of the Dodge
and from around it and it was carefully driven out of the garage. The spare
wheel was moved from under the false floor and fitted to the side, then the
bows and canvas were fitted. For now, removing and refitting the canvas and
bows was the only way to get the Dodge in the garage - at least until the
builders show up!
|
On March 22nd, 2021, the Dodge left the shipping
container for the last time. I made the short 3 mile drive to our old house in
Washington for a check over and tyres blown up, followed by the 12 mile trip to
our new house in Durham.
|
We just went on a short local drive to get some
photos in the new colour scheme, then back home to pack it all away before the
rain came. There were still a few small jobs to do, such as touching up
various nuts, bolts and screws after fitting and these jobs were finished off
over the next few days.
|
At the new house, we planned to
raised the garage door lintels by three courses of bricks. That would allow the Dodge
to fit inside with the dome
removed, just as it had in its shipping container storage. We booked some
builders virtually straight away.
|
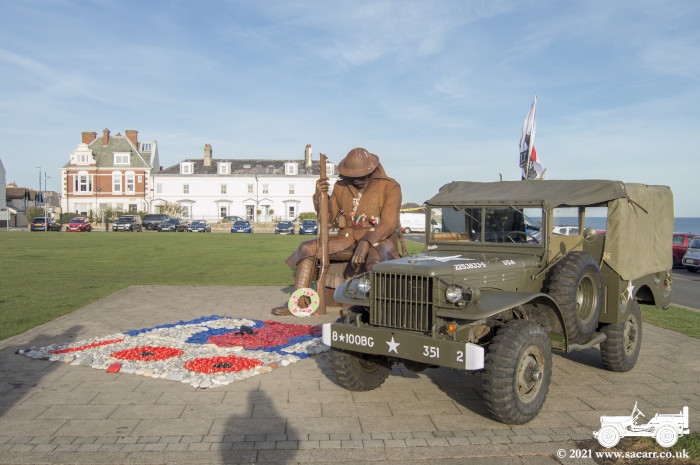
I managed to get the Dodge out to
events twice in November. Both were Remembrance day events at the Seaham
memorial. The first shown below was
on the 11th, after which, I visited several other memorials on the way home. Sunday the
14th was the second outing.
|
The Dodge was in hibernation from September 2019,
through the covid lockdowns, until March 2021 when we moved house. It's only
activity had been a few engine runs in the container and the drive to the new
house. After the long break, I wanted
to get it to at least one event in 2021. It was given a good service and a local
test run in early August, to make sure all was in order.
|
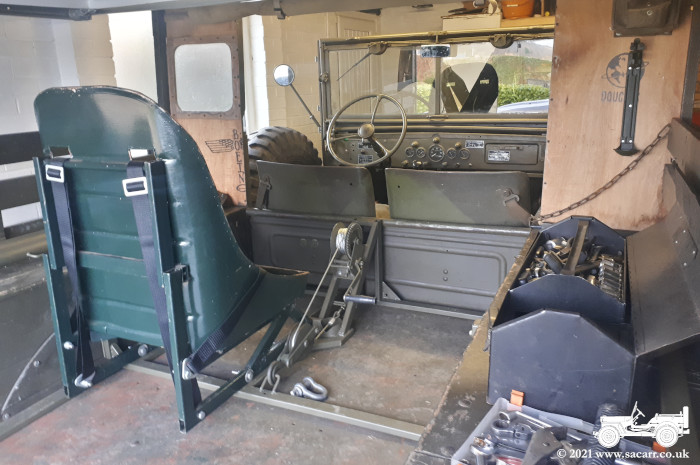
Repainting the Dodge was only the
first phase of its transformation. After having the Flying Control truck for so
long, I couldn't just have a normal Dodge. My old garage had a steel beam for a
chain hoist, used for Jeep engine changes. What if the Dodge had a crane fitted
to give a bit more mobility to the hoist? The false floor was removed, my
daughter's seat frame lowered to the floor of the truck and a winch added which
would be part of an A-Frame crane.
|
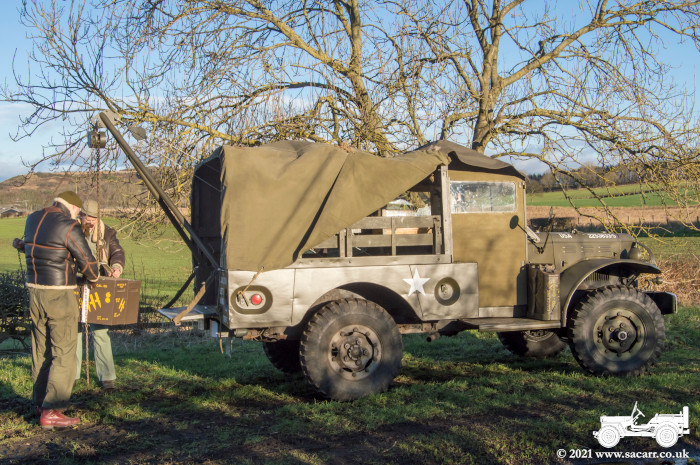
The next time out and what would
become the last appearance as a Flying
Control truck, was at the Fishburn Airfield Fly/Drive-In during mid August 2021.
The Dodge attended one of the two days. At this point, the Dodge was still
living outdoors as the builders were still nowhere to be seen. After that, circumstances dictated a change was in the air for the Dodge.
|
The seat frame was extended
backwards to provide pivot points for two steel bars which formed the A-Frame
crane. A head was added to the bars for the winch to attach to and for a hanging
point for the chain hoist. Three hooks were added down one bar to hang the
raising and lowering chains out of the way. The lifting hook can attach to the
Dodge tow hook when driving, or the whole crane can be quickly dismantled and
stored inside.
|