How
hard can it be? Well, not as hard as you may think, so long as you have
some basic pieces of equipment and lots of space. A Jeep in bits will
take up at least twice the space of a parked complete vehicle!
I
had never been interested in vehicle maintenance until I got my
Hotchkiss Jeep. A car was just a tool to get somewhere. Once I had the
Hotchkiss, I started doing my own servicing, oil change, bleeding and
setting brakes, setting valves, etc., but had never done any serious
dismantling of the Jeep. The
Ford was purchased in January 2012, as an investment. It had been on
Ebay three times and failed to sell.
I
contacted the seller and asked if it was still available, and it was.
The reason I was so interested was that it had loads of 'f' marks and
'f' marked parts all over it, and lots of the small bits that soon add
up such as handles, footman loops, brackets, pintle hook, spare wheel bracket
etc.
I
wanted to try and keep as much original material as possible in the
rebuild. I prefer to think of it as a rebuild rather than restoration,
and I also wanted to keep a used look, maintaining some history and
character, rather than a perfect out of the factory look.
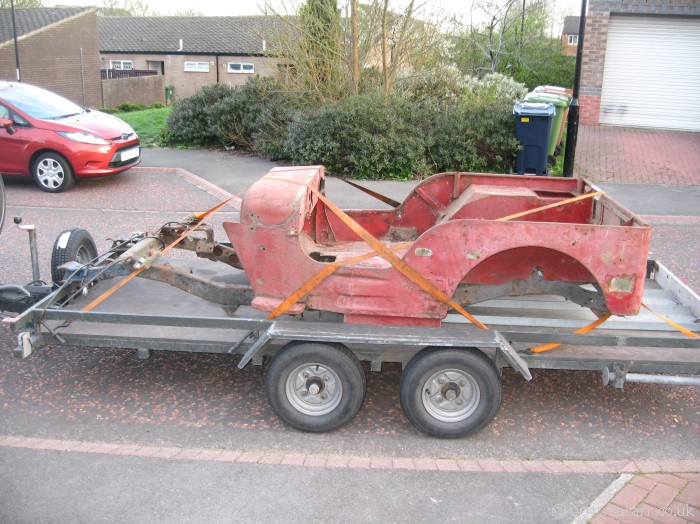
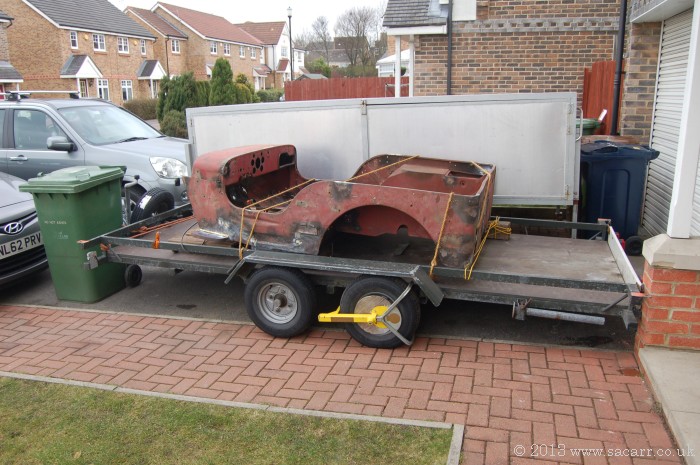
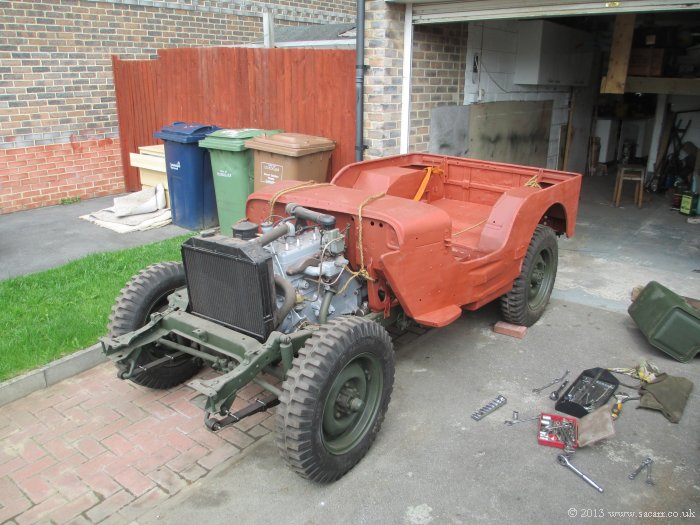
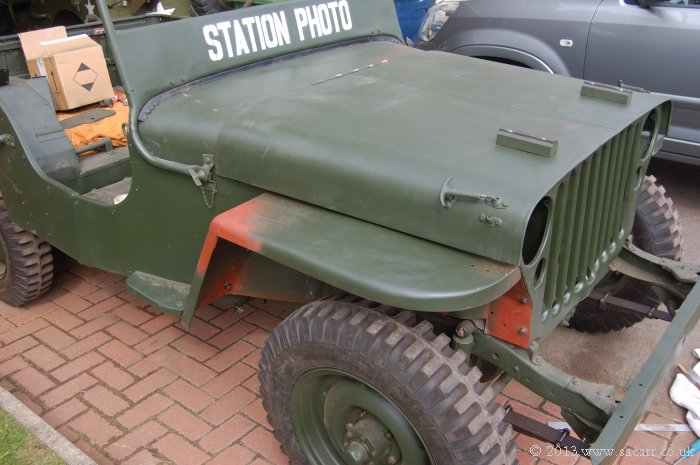
The
tub was in a poor state, and had been, cut and chopped, and bits welded
on and over existing rotting metal. While it looks fairly intact in the
picture, much of it was paper thin and beyond use. It was beyond my
facilities to save, only the firewall and instrument cowl really being
useable, so it was cut up and parts sold. I kept all the fittings, the
hood, fenders and grill. I didn't want a repro tub on it, so the search
was on for a tub in good condition, or at least within my ability to
repair.
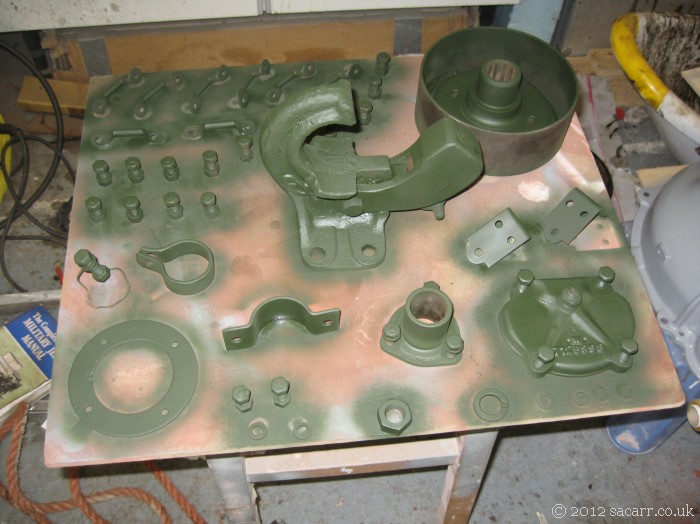
The
first job was to strip all the small parts from the tub, followed by the
fenders, grill and hood. Rather than spend just months of pulling things
to pieces, many of the small parts were cleaned up and painted as I
went. This meant that when it was time for re-assembly, the parts would
be complete and ready to use.
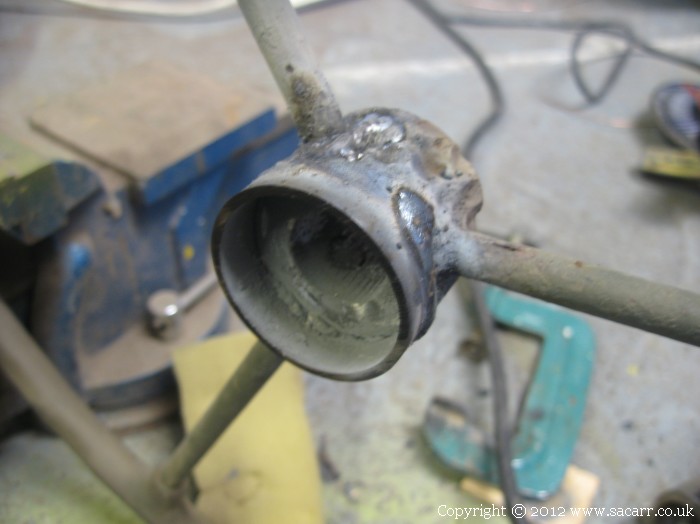
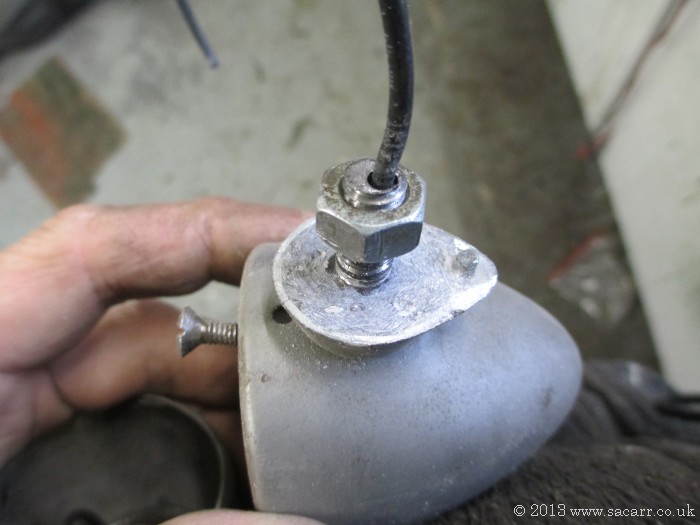
As
many parts as possible were repaired, rather than replaced, such as
building up the metal on the steering wheel nut with weld, and then
dressing it back down with a grinder and file. The same goes for the
repairs to the steering wheel hub.
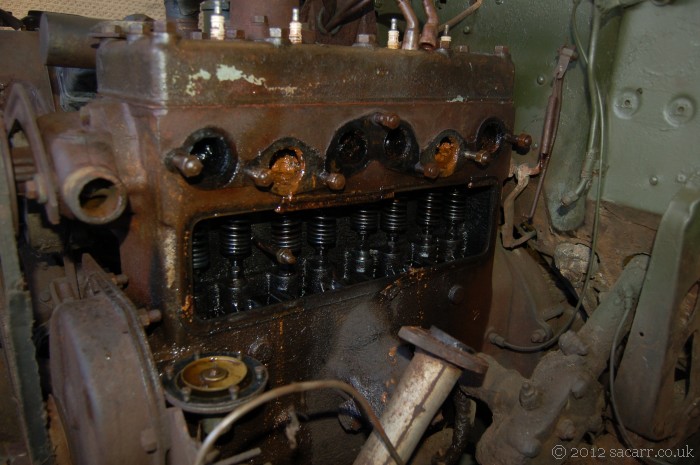
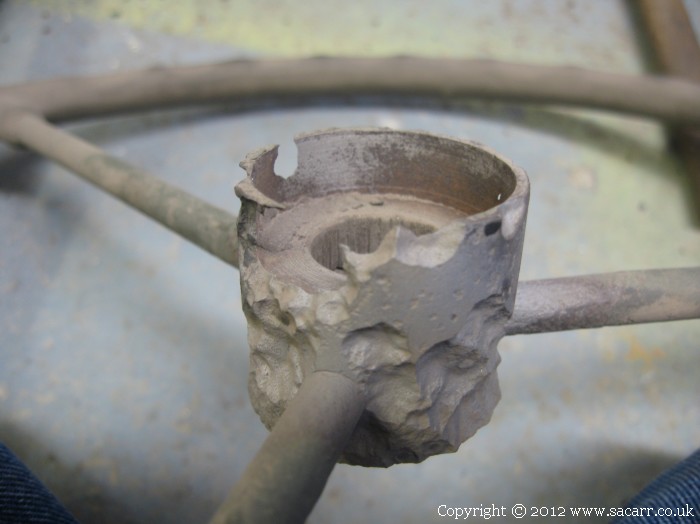
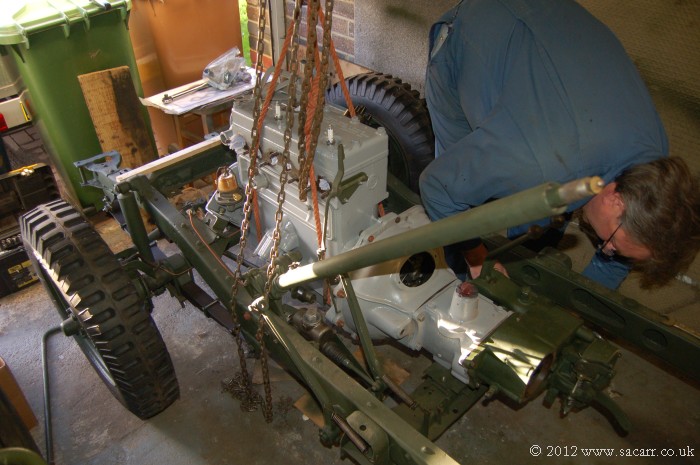
Not
sure what's oozing out of the engine!
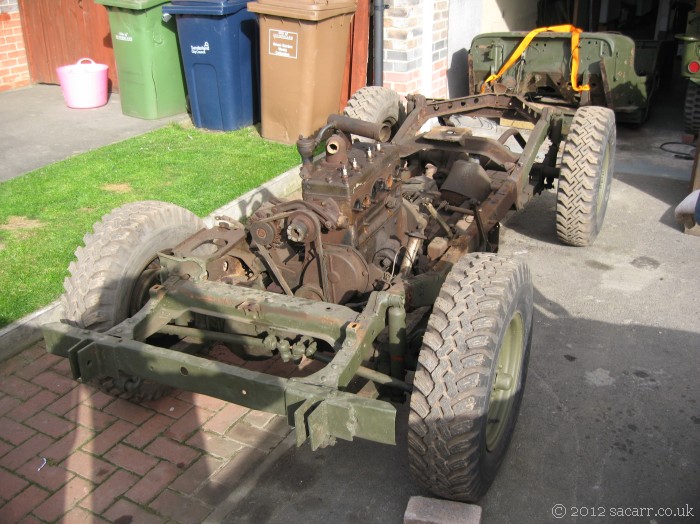
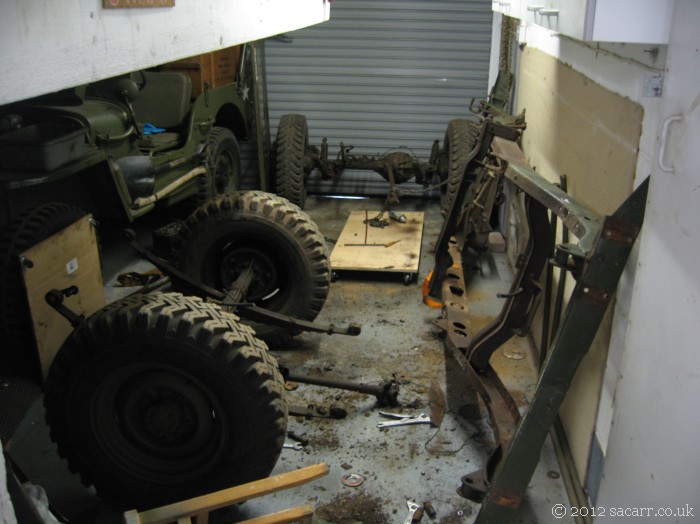
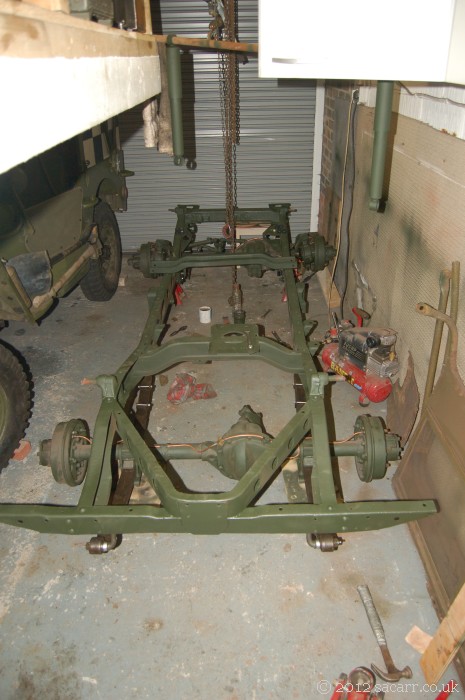
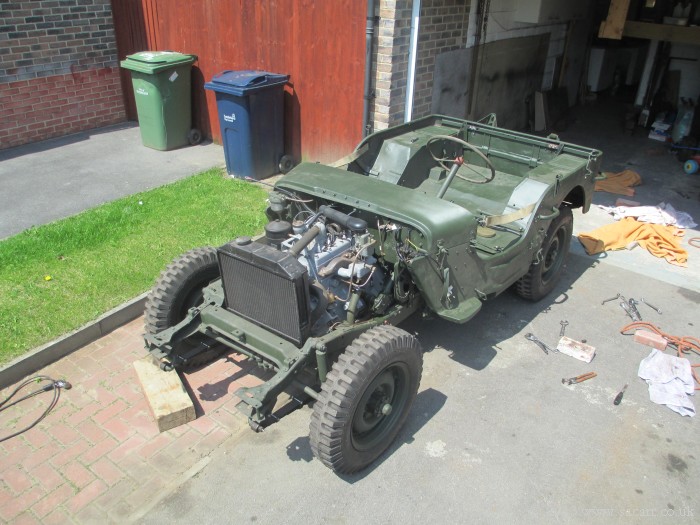
Rolling
chassis ready for strip down
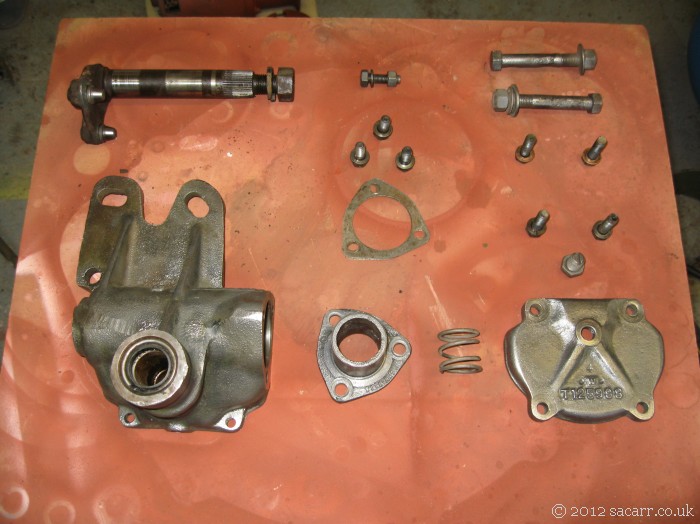
Steering
wheel repairs
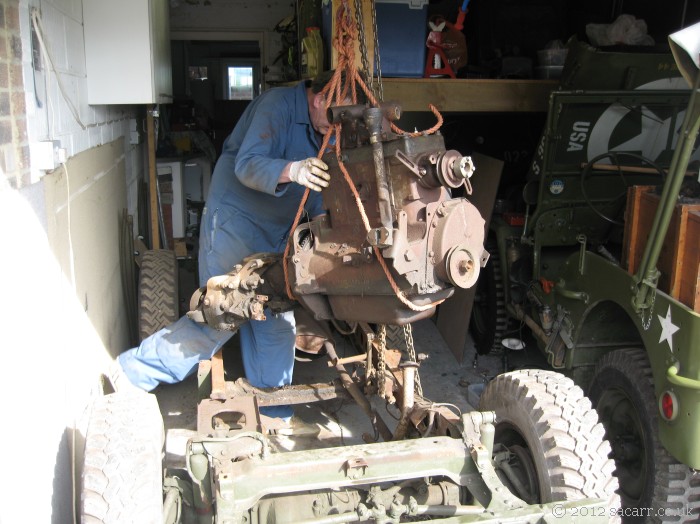
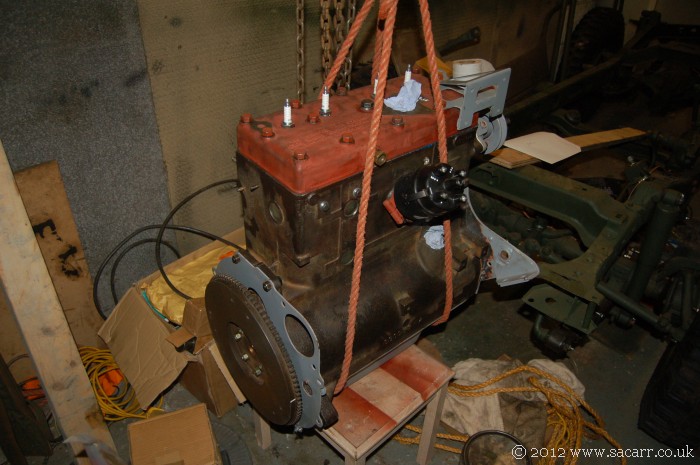
Engine
out
Steering
wheel nut, before and after
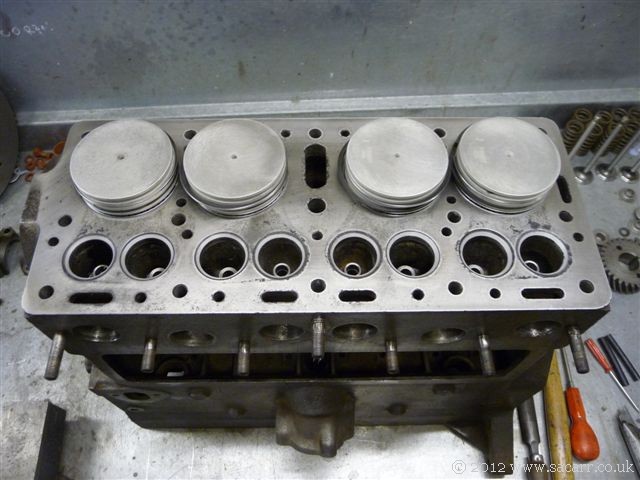
Once
much of the hardened grease and mud had been removed from parts, a
number were in very good condition. Maurice Jennings was doing the
engine rebuild for me, as he was an engine rebuilder before retiring.
The engine block was intact but needed work. It is a Ford head, but a
pre-war Willys block, presumably from an Americar or similar. I don't
know when it received this block. It had been bored out and had
oversized pistons.
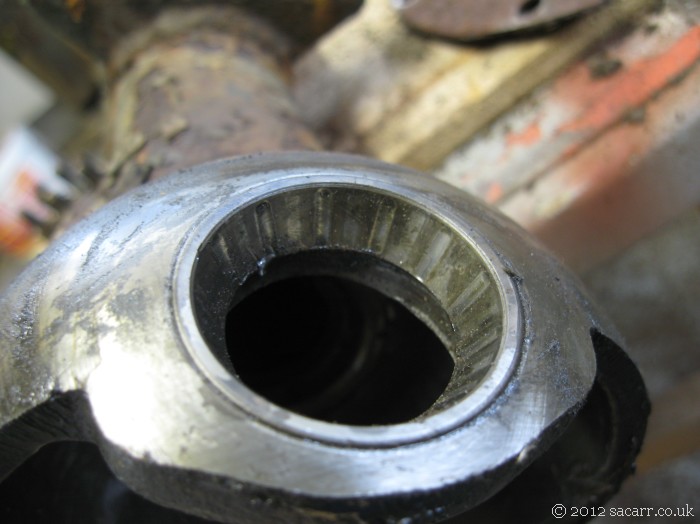
Bit
by bit, the chassis was stripped down until eventually the axles were
removed. From purchase, the steering had been; lumpy. A look at the
steering knuckle bearing soon showed why, with flat rollers and
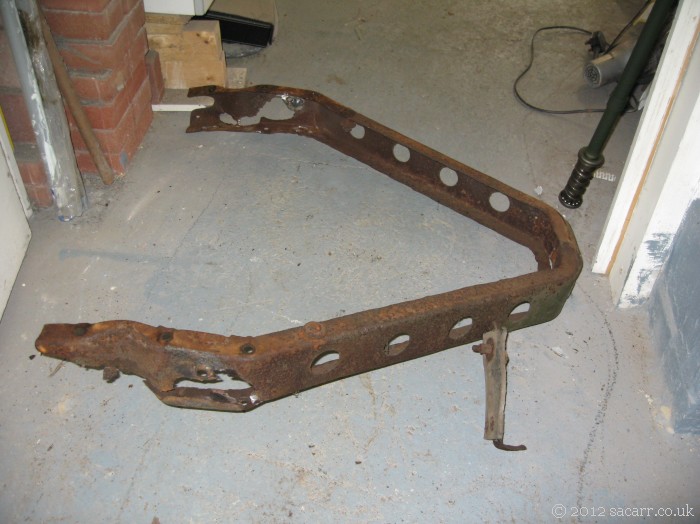
indentations in the seat! There were a number of areas on the chassis
that would need welding and the pintle A frame was badly rotted where it
was riveted to the chassis.
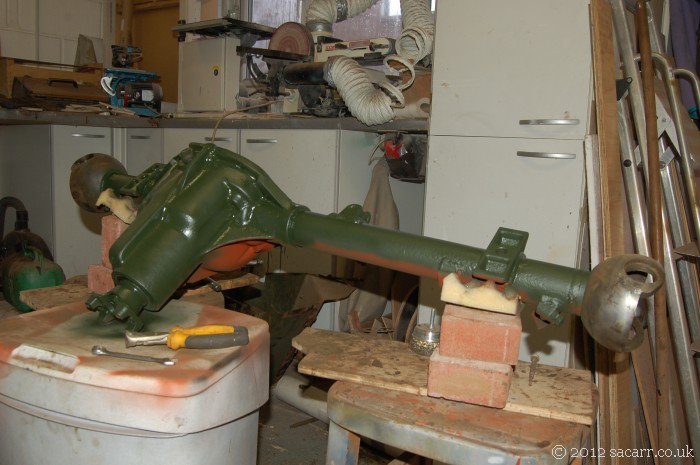
The
first major sections to be worked on were the axles. Despite little oil
in the diffs, everything inside was clean and the gears were in good
condition.
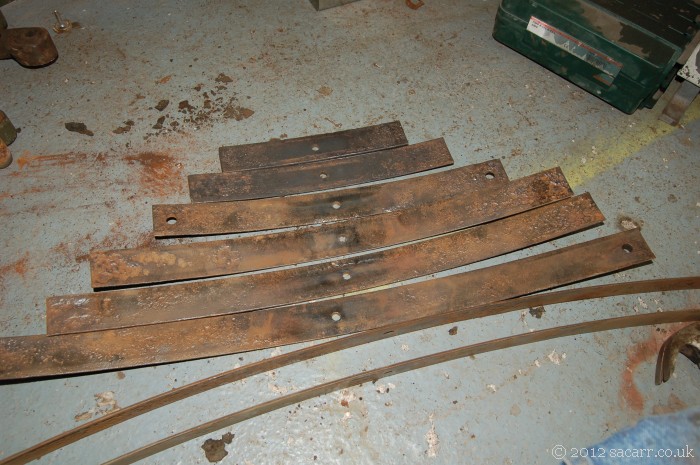
The
springs were also completely stripped for overhaul. They were Ford
springs, but at some point had a mix of Willys clamps around the leaves.
These were removed and new Ford type clamps would be made. The springs
and many other pieces were treated with electrolysis to remove rust from
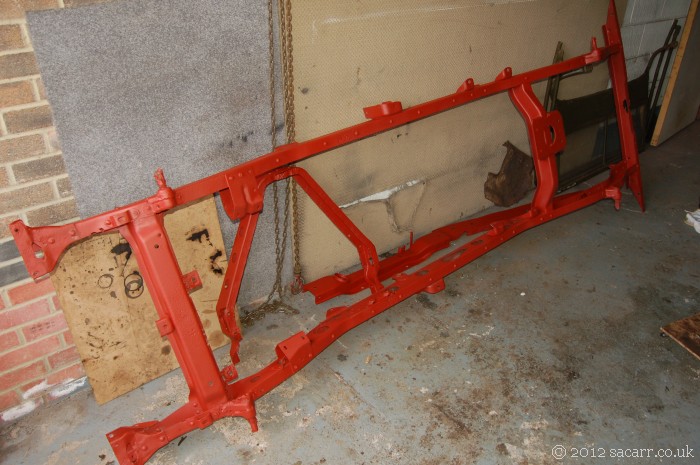
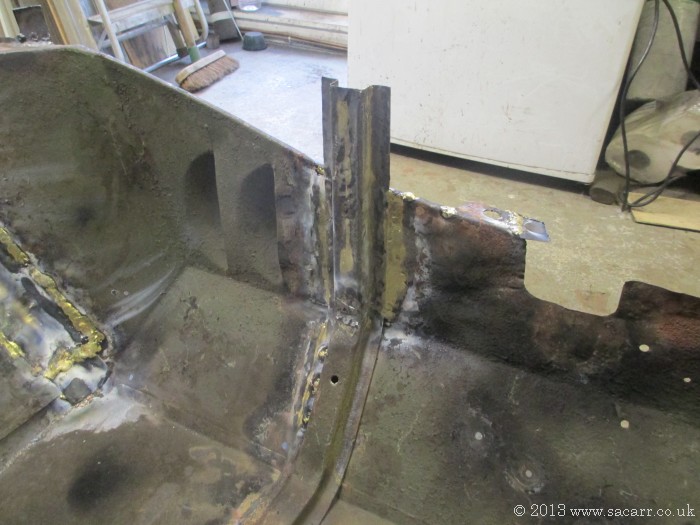
the surface and pitted areas. The chassis was sent to a local blasting
company who stripped and primed it, the A frame, bumper, and the one
seat I had. After much welding, grinding and painting, the chassis was
mated back onto the axles.
The rear axle being repainted
One of the springs stripped for cleaning
The newly blasted chassis
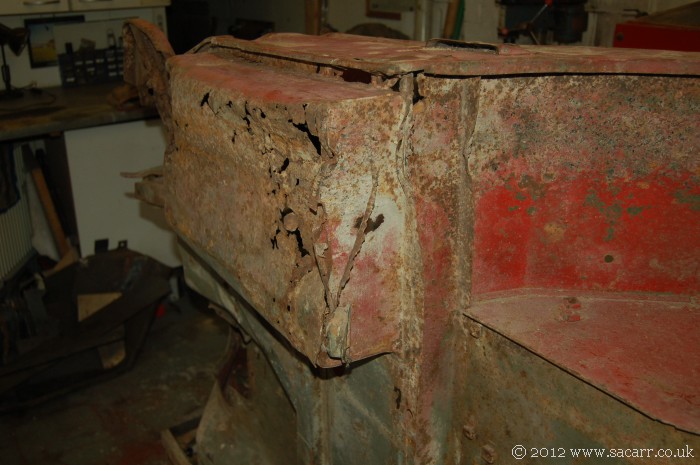
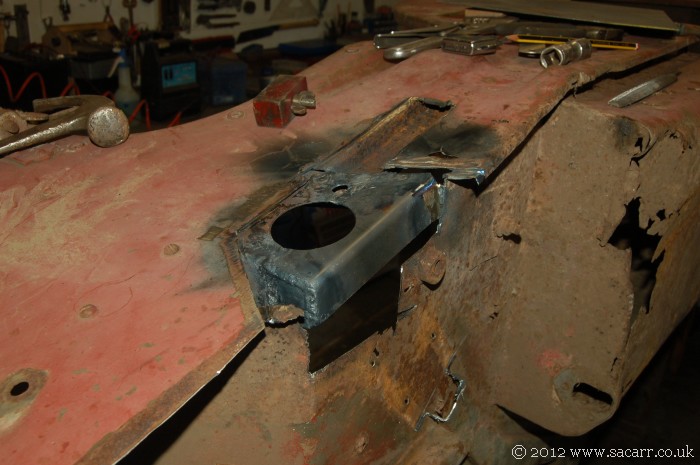
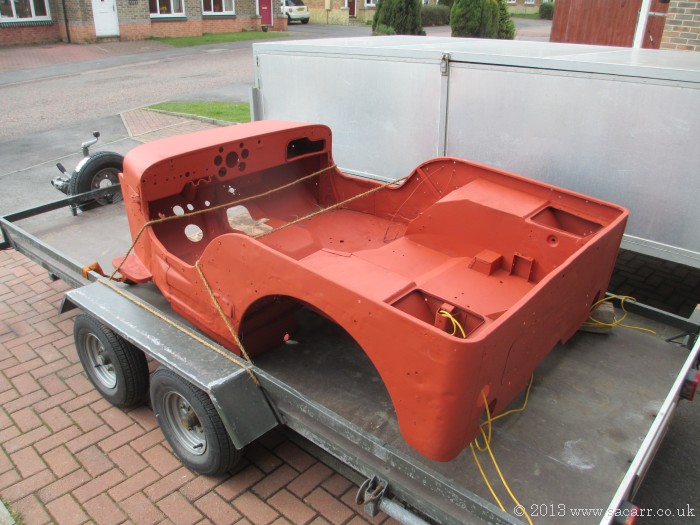
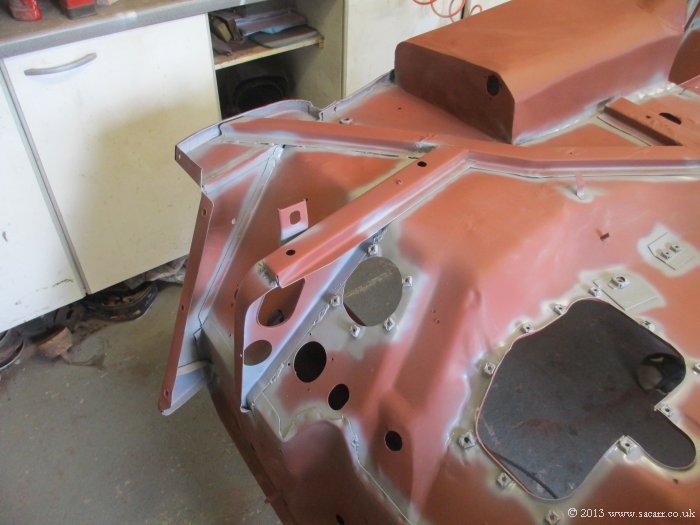
While
searching Ebay, I found an original wartime tub, chassis, fenders, hood
and grill for sale. I only really wanted the tub, but the other parts
could be sold, so that the tub effectively cost me nothing. While it did
need some repairs, it was fairly solid and easily repairable with the
equipment I had, without the need for complex jigging of the parts. The
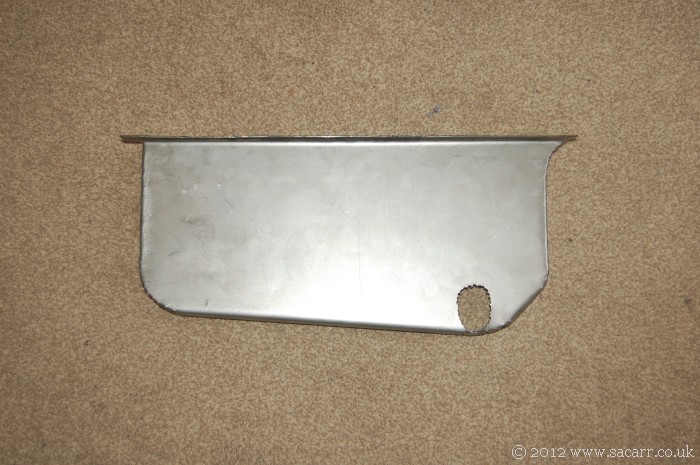
tank well was rotten, and along the bottom edges of the sides; the usual
places, and the hat channels, but all fixable. I managed to salvage one
end of the tank well, but the other end and main skin would have to be
made new.
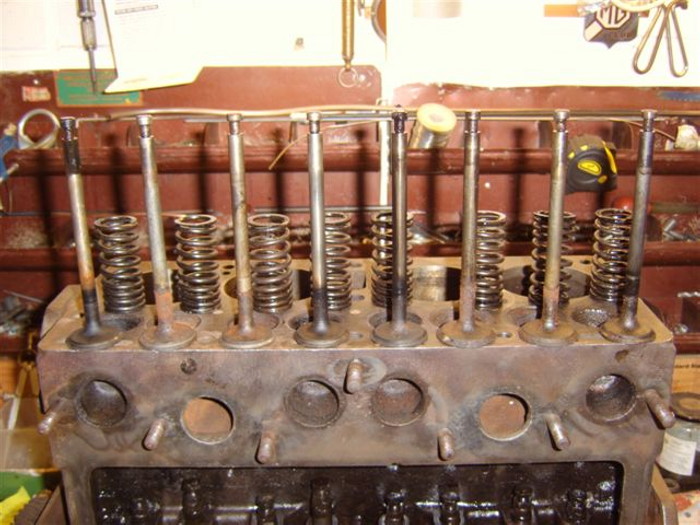
After
the repairs on the tub were completed, the tub went off for blasting to
a company only 1.5 miles away! In the mean time the engine had been to
the machine shop, and had the head and block skimmed, and the oversized
cylinders sleeved back to standard size. The cam drive had been bodged
at some point with gears, but not all the right parts, so Maurice
rebuilt it back to chain drive with all the correct feeds, reversed cam
shaft and oil pump drive. New valves and springs were also fitted as the
old ones were too corroded.
The
gear box was a rare early type, with the right side filler. Both that
and the transfer case were rebuilt by Jeffery Engineering, as much of
the internals had been sitting in water at some point, with little
useable. Once the engine, transmission and transfer case were back, they
were painted, and with the help of Mike Scorer, fitted back into the
completed chassis. The steering column is seen trial fitted here, but
was removed for fitting of the tub due to the limited lifting height I
had available under the engine hoist used for lifting the tub.
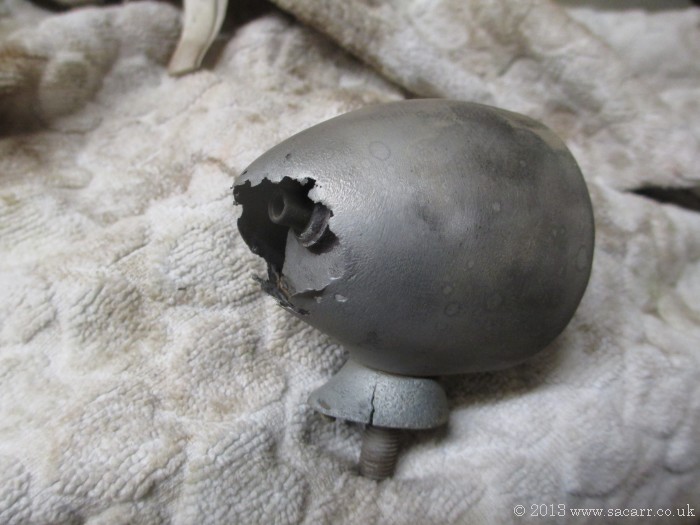
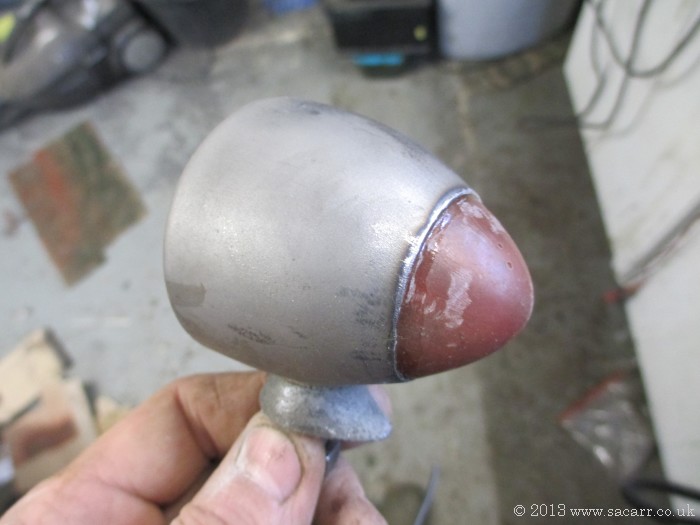
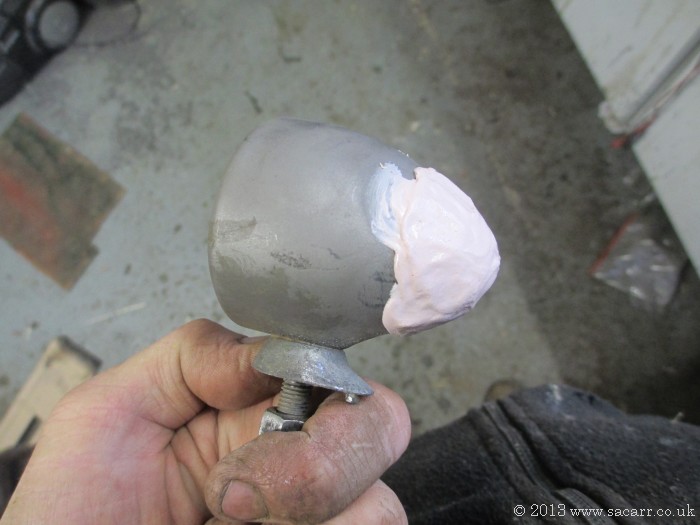
The
marker lights were 'f' marked, but needed repair. The mounting point
casting on both was brittle and cracking, one mounting bolt had sheared,
and the back of one lamp had corroded away. The easiest way to repair
this was a small fibreglass moulding. The good lamp was pressed into
plastercine to make a mould, and layed up with epoxy and 50 gram glass
cloth. This was inserted into the light, and blended with filler. The
teardrop mounting was filled with a mix of epoxy and milled carbon fibre
to reinforce the brittle casting.
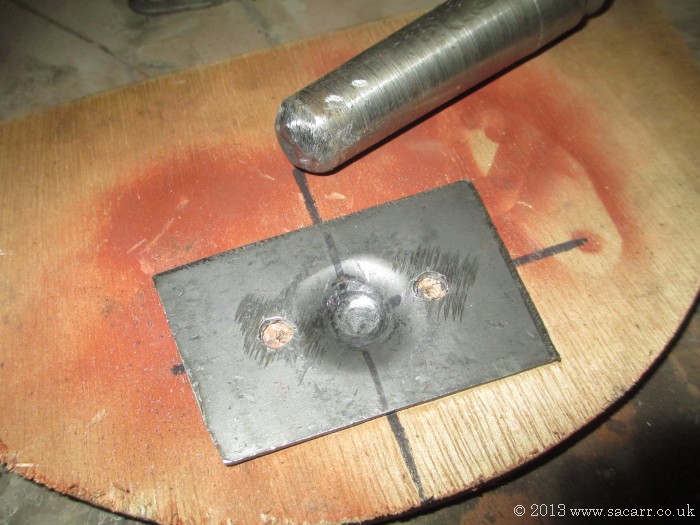
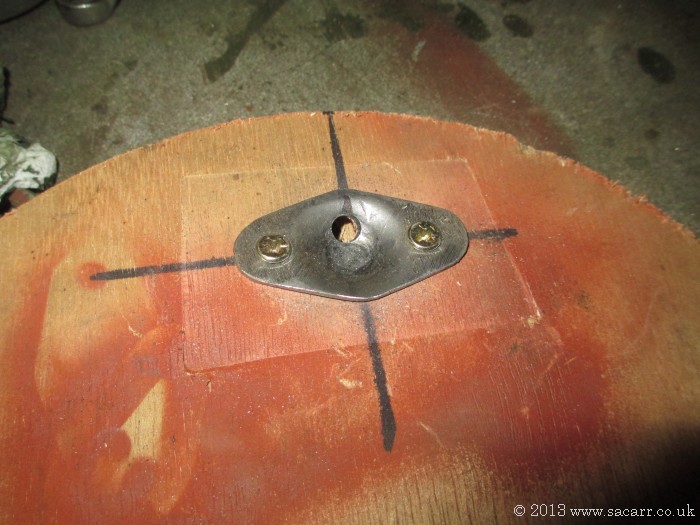
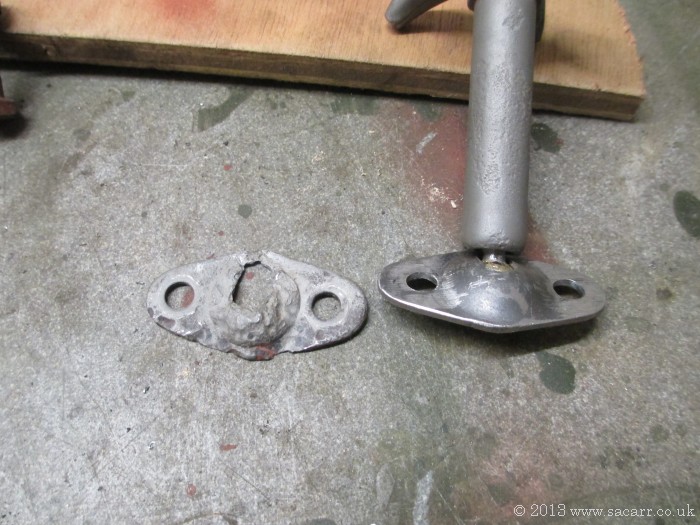
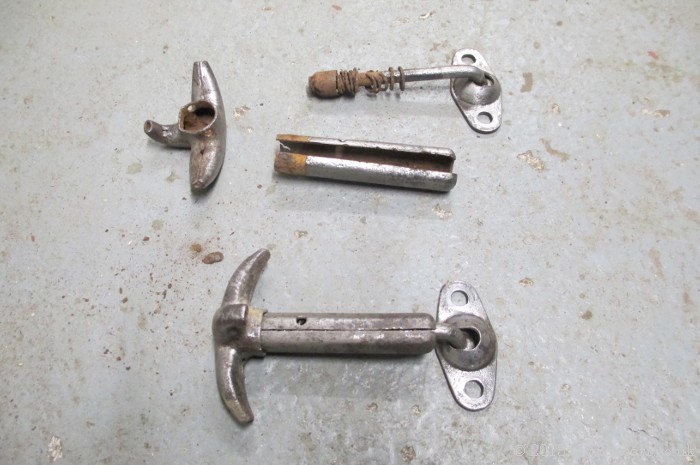
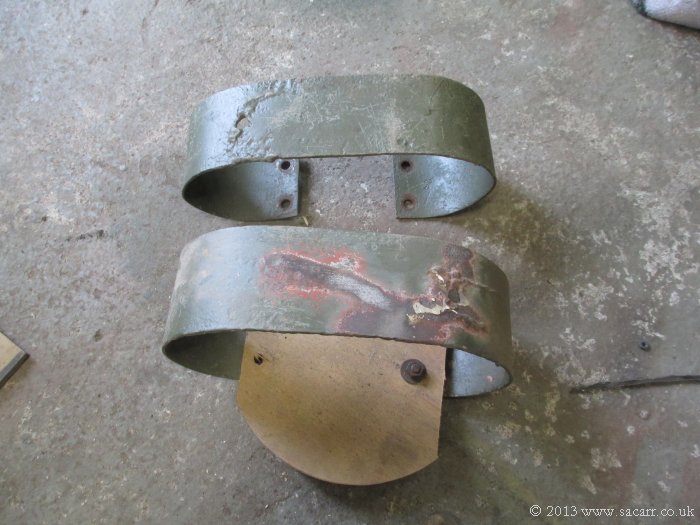
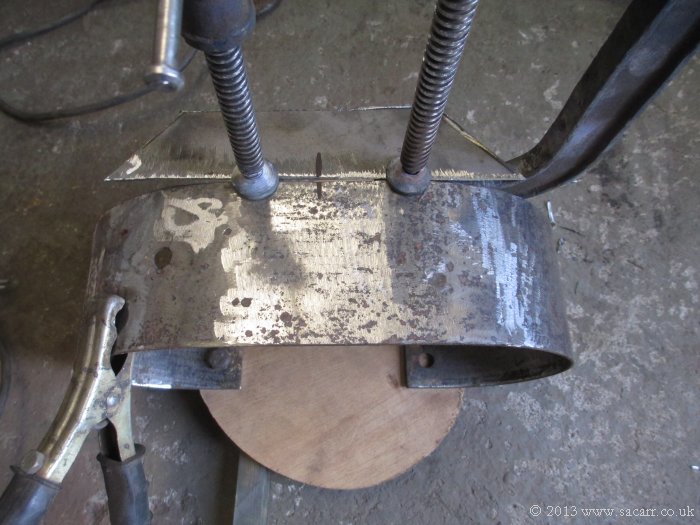
The
hood clamps needed a bit of work. The base on one was badly corroded and
the springs in two others had broken. A new base for the screen clamp
was beaten out of flat sheet and the clamps were opened and cleaned up,
and new springs wound from thin piano wire.
A
hole in the wood allowed the sheet to be beaten to shape and drilled
Original and replacement
<Screen clamps stripped
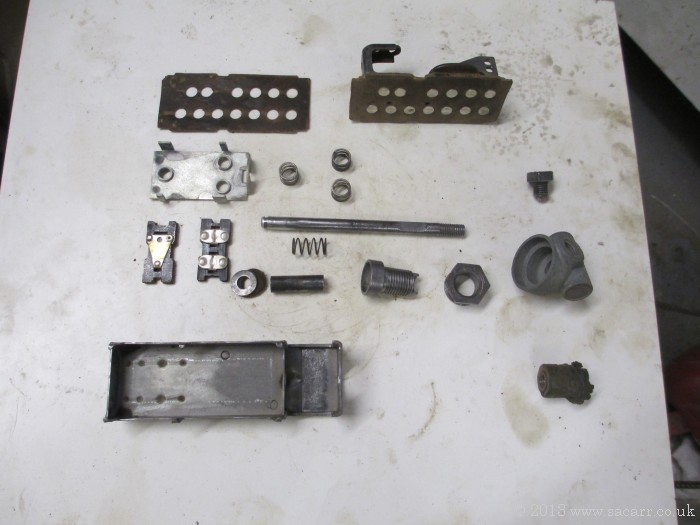
The
light switch was stripped and cleaned. I've never seen so many parts in a switch before!
I
had four fenders to play with, two from the original Jeep and two that
came with the replacement body. The second pair were in pretty good
condition, but I decided to sell those and repair the originals. This
involved new sheet metal work where the fender meets the tub and new hat
channels making in places.
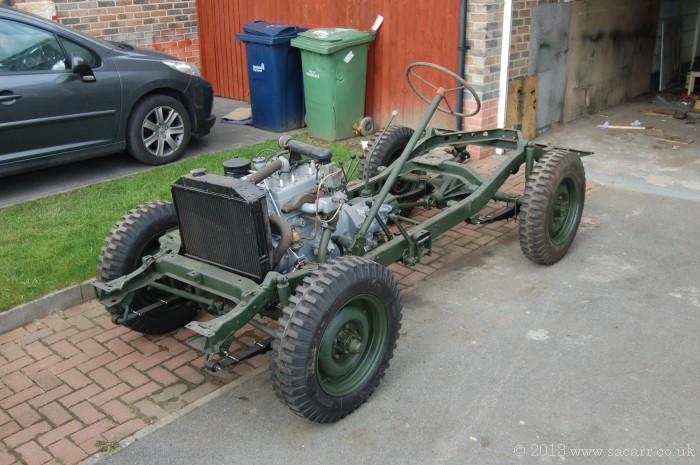
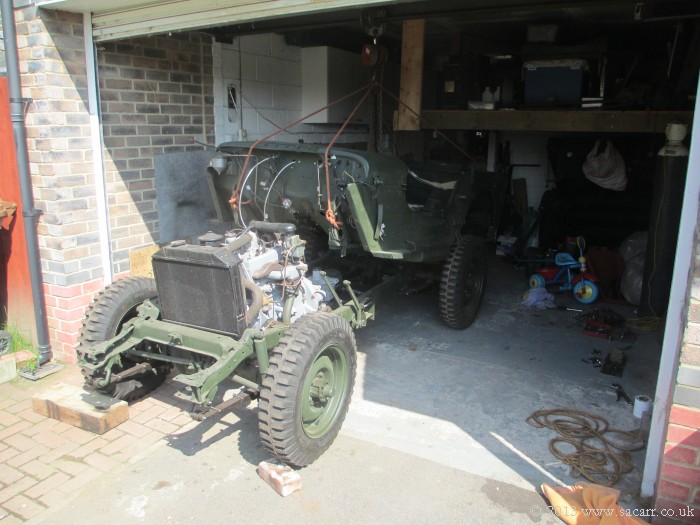
First
roll out of the chassis with the engine and transmission installed. A
completely pointless exercise except for the feel good factor it gives.
The radiator is seen fitted back on the Jeep. This was re-cored and
tested by a local company who also repaired the tank. There was one
small hole and some snapped off studs where the tank sender fits. Far
right, the tub is seen on the chassis for a trial fit to check hole
alignment. This was a two man and engine hoist job, so thanks to George
Lovell for giving up a day for just tea and biscuits!
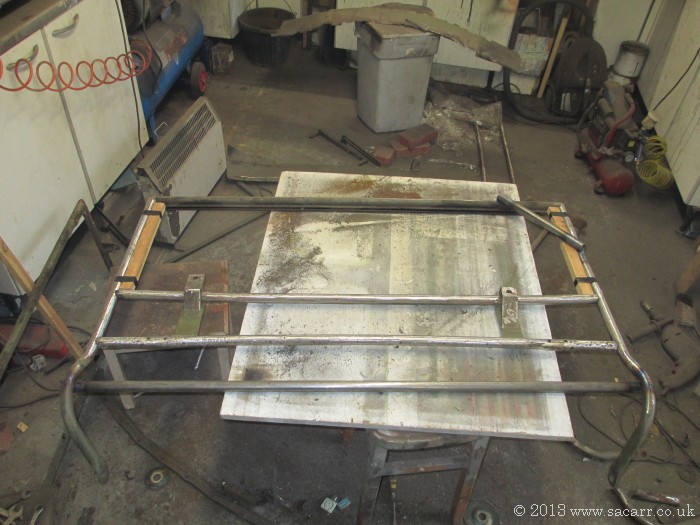
The
windscreen frame, both inner and outer, were rotten in places.
Fortunately I got hold of another dying frame and was able to make one
good screen from the two. The outer part was in good condition, but the
two bars which support the skin were badly rotten. These were cut from
the other screen and welded in, and a new skin added. The brackets for
the inner screen arms were also salvaged from the second frame. The
inner frame was also repaired with parts from both, carefully rebuilding
the 'H' section metal with brazing rod.
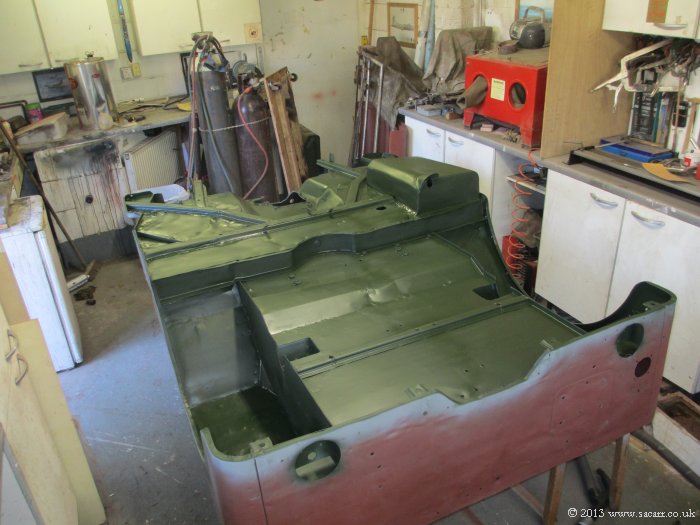
I
decided to undercoat the tub with the gloss grey engine paint. Matt
paint isn't generally a good water barrier, where as the gloss would be.
I wish I had done this on the chassis too. So using my mini spray gun, I
sprayed into all the difficult corners first before switching to my HVLP
spray gun to coat the general area. This was left to go 'green', but
before it was fully dry, the olive drab was sprayed to get a good
chemical bond between the two layers ( Olive Drab Matt No2 from Frank
Burbury ). After that was dry, a second coat of olive drab was sprayed.
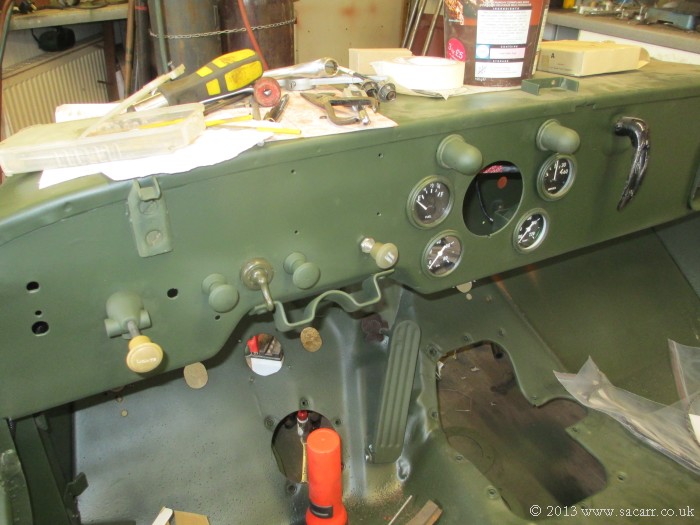
Once
the top and bottom has been sprayed, it was left a couple of days to
harden, then it was time to start fitting out the instruments and
wiring. Access was better with no seat fitted, but I still found that
working with the tub on its side gave the best access to the underside
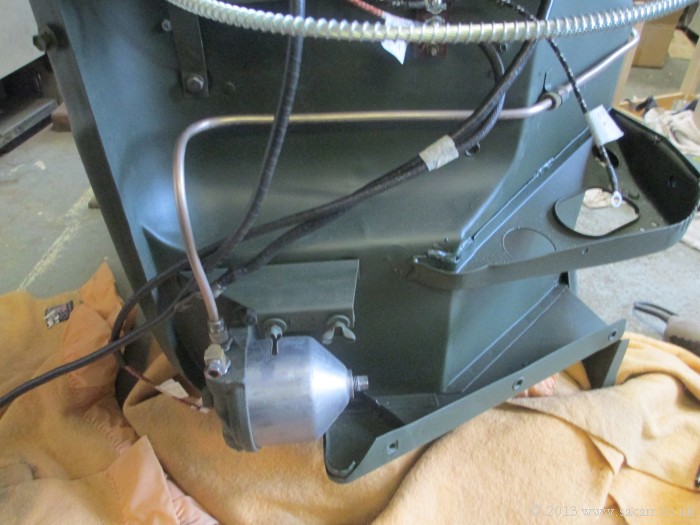
of the dash. With the instruments and wiring harness fitted, I made up
the fuel pipe from the tank to the firewall filter. All the fuel lines
and brake pipes were made, rather than bought as finished items.
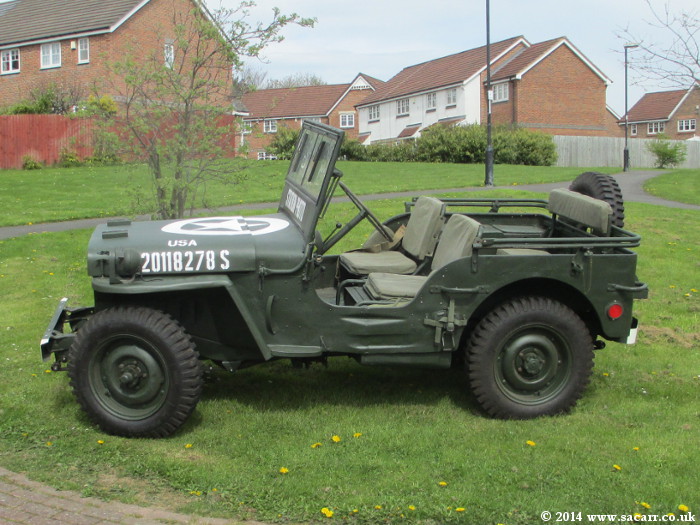
When
all the lights, wiring and pipe work had been fitted, it was time for
the big day to fit the tub back on to the chassis. I managed to refit
the painted tub on my own. The fit went well and quickly due to the time
spent with the trial fit before it was painted.
On that day, the tub had been on and off several times making slight
adjustments to get the fit right.
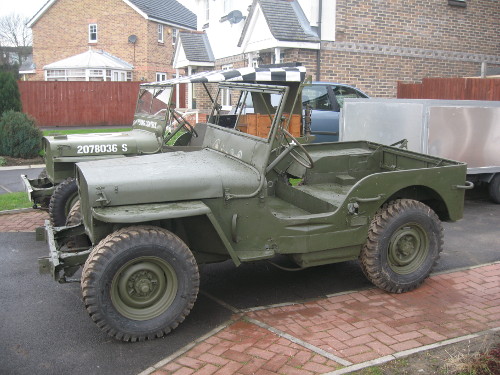
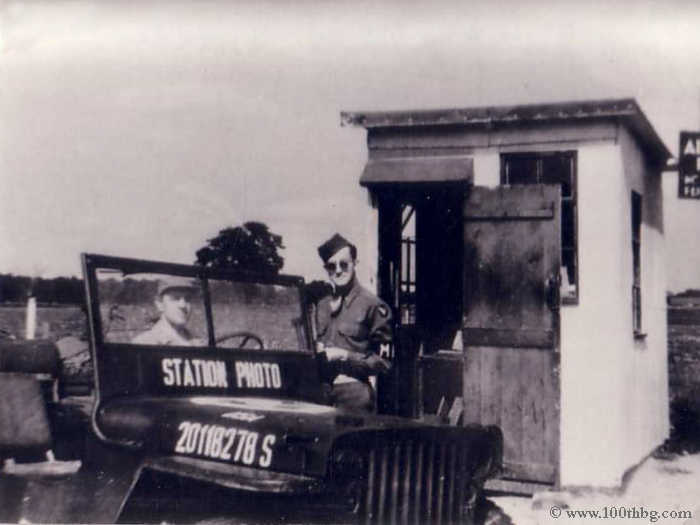
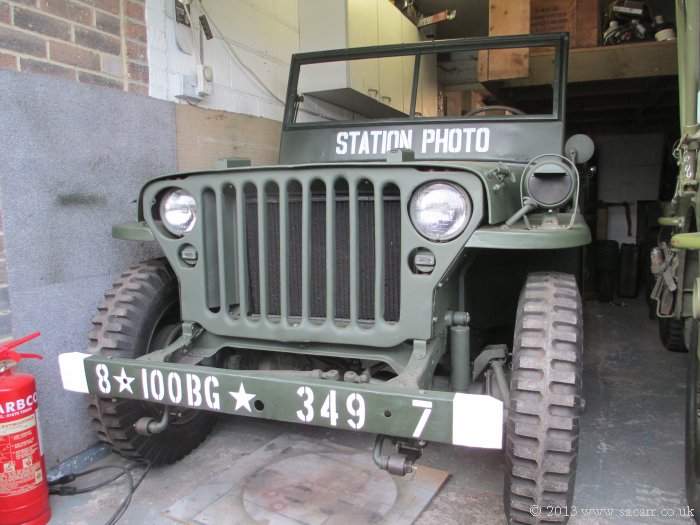
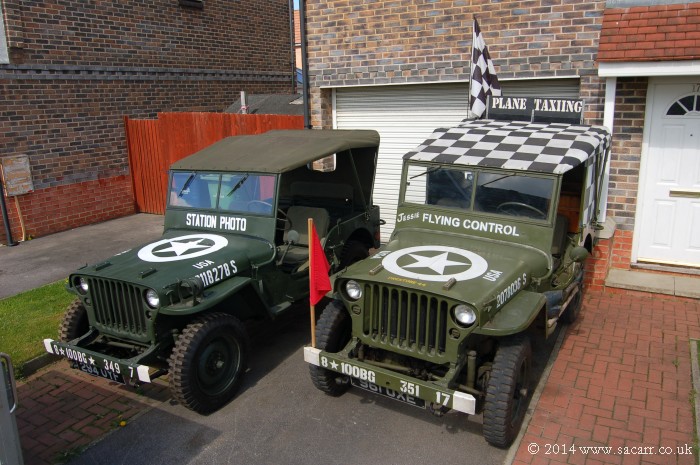
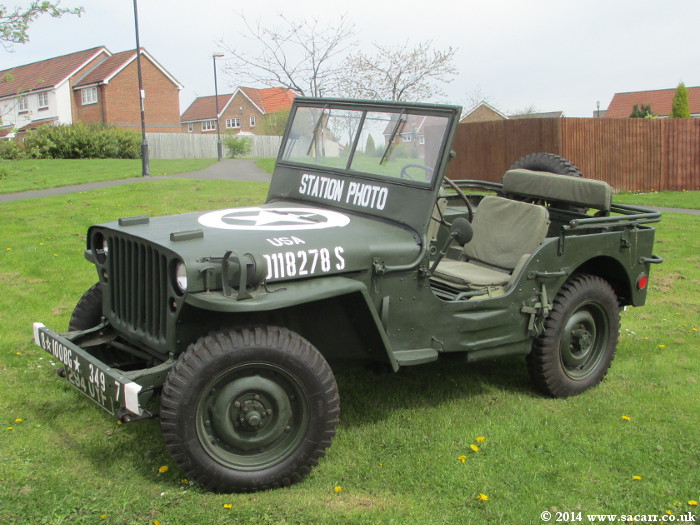
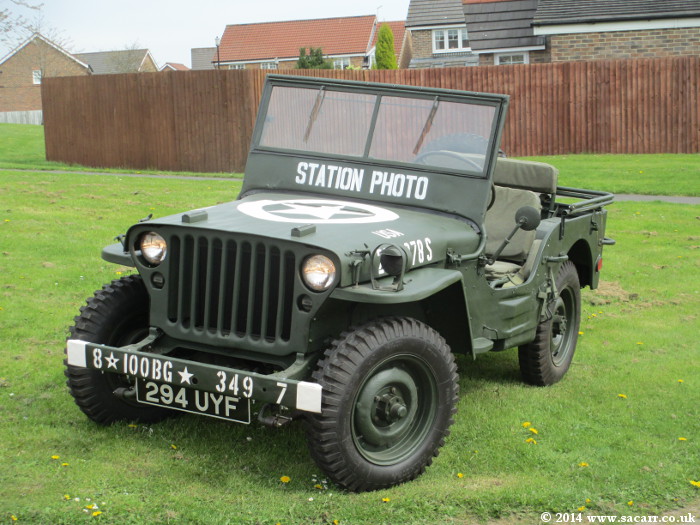
For
some time I had been thinking about the colour scheme, and I wanted to
stay with the same 100th Bombardment Group theme as my other two
vehicles. I had found three pictures of the 100th's photo lab Jeep, one
of which was colour, showing the front and rear of the Jeep. Close
inspection of the rear view shows that it is a Ford Jeep with a script
body. While mine isn't scripted, it is at least a Ford.<
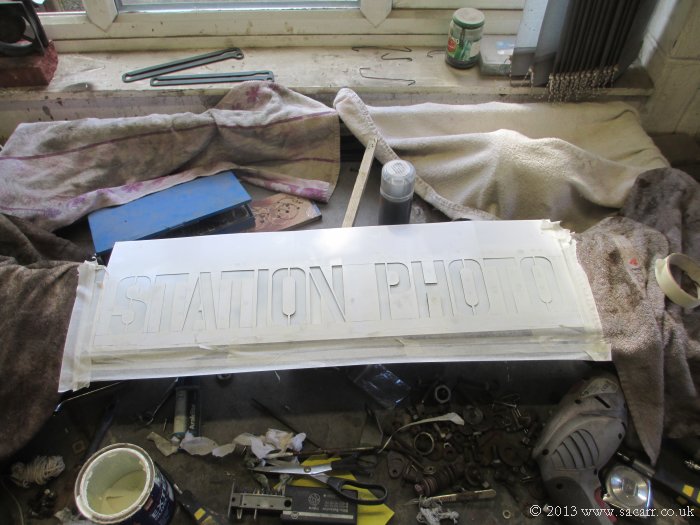
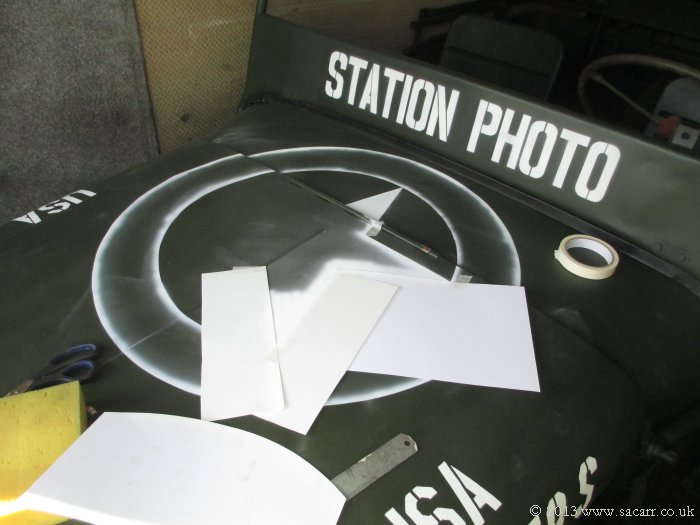
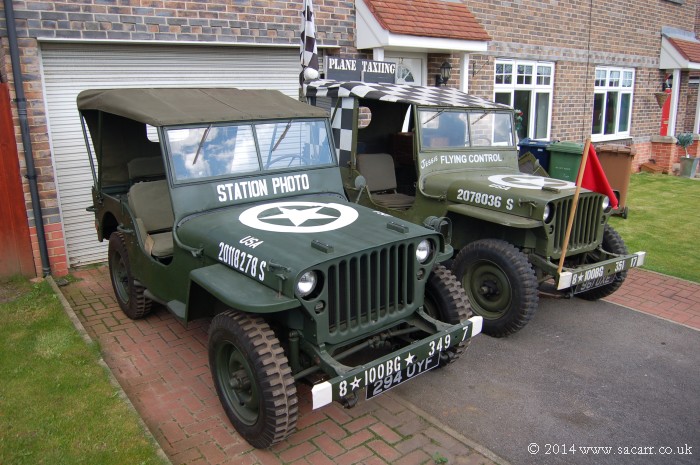
So
with the scheme chosen, I spent some time working out the size of the
"Station Photo" across the screen before cutting a card
stencil, and spraying it on. I didn't want nice crisp edges, as this
would be unlikely for a field painted vehicle.
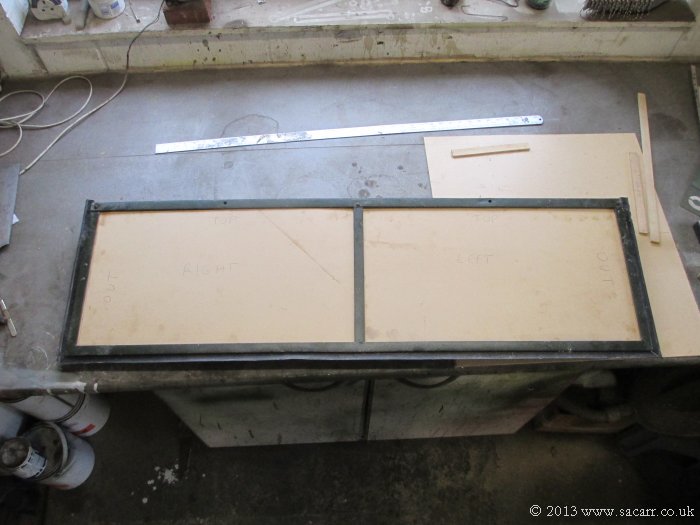
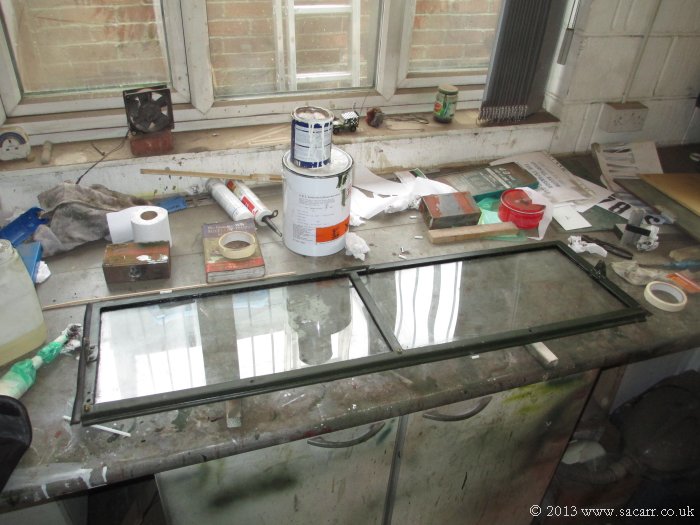
With
the inner screen frame complete, I made some 3mm MDF templates which
were taken to Pilkingtons for glass to be custom cut.
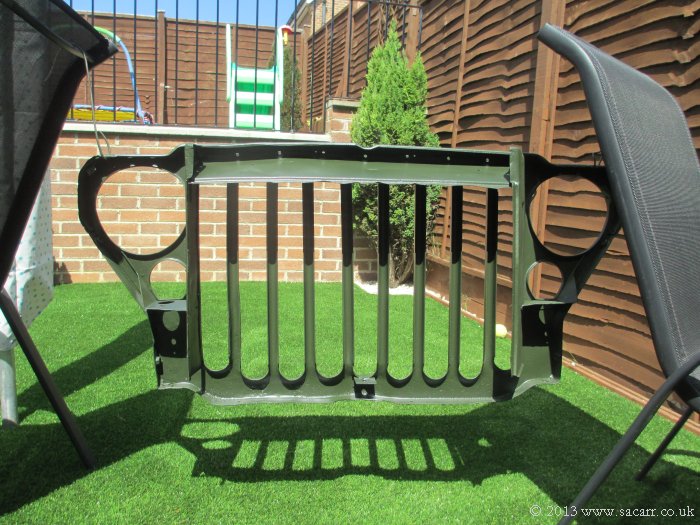
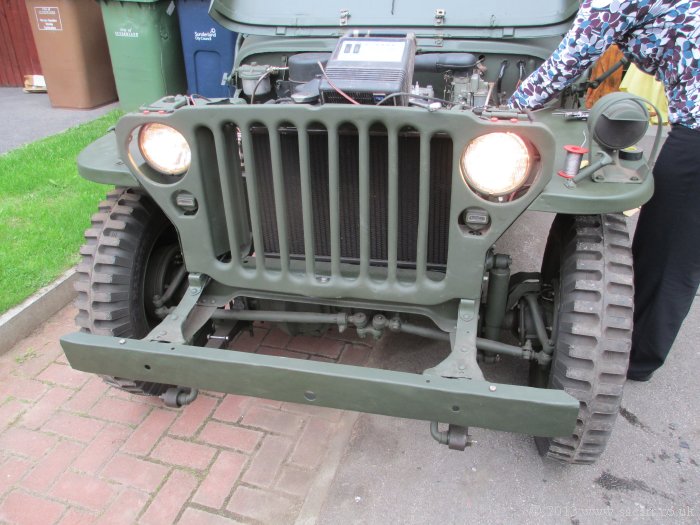
The
fenders needed a little pulling and twisting to fit properly to the
grill, and the hood needed a bit of 'adjustment' to fit neatly around
the instrument cowl. Eventually I got a reasonably even gap around the
rear of the hood and also against the fenders. The headlights were then
fitted and connected up and the electrics tested.
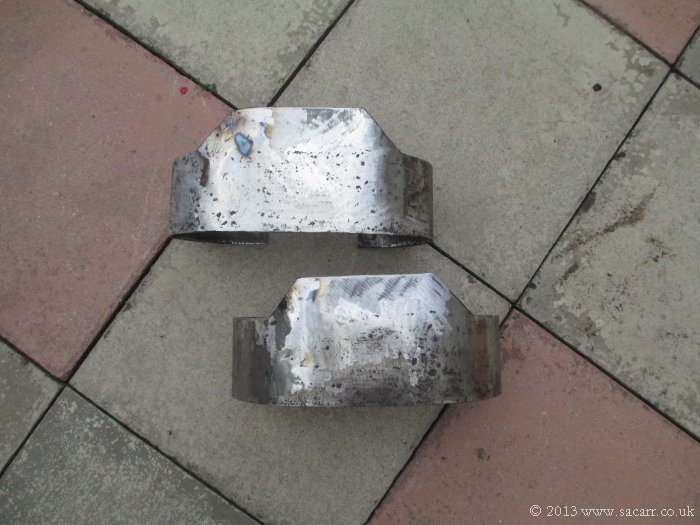
The
rear bumperettes were very battered, cracked and not the right shape.
However, upon close inspection, they were 'f' marked, but had the tops
cut off. After cleaning up the original part, a new top piece was cut
and welded in place, dressed and primed, before the paint and markings
could be applied. It was nice to have saved yet another 'f' marked part,
many of which were found all over the Jeep, even down to the smallest
parts.
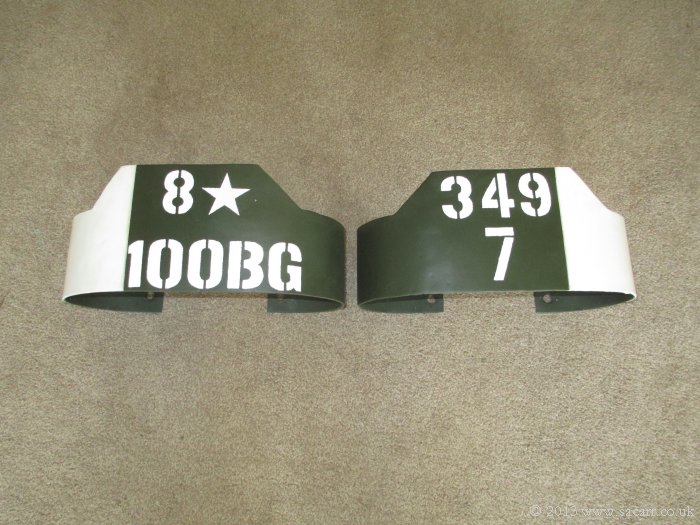
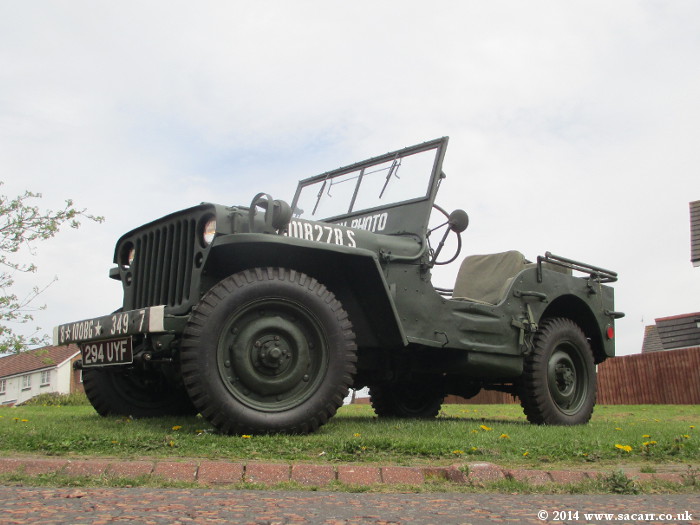
Much
time was spent again studying the wartime pictures and cutting bumper
stencils to match the font. Hood markings came next. I made several
paper star of various sizes, placed them on the hood and photographed
them at the same angle as the wartime picture by the check point. I
eventually worked out the correct size and unusual rearward positioning.
I've seen rearward stars before, but never with the large circle border.
Soon after the markings were finished, the glass was ready, so was
collected and fitted.
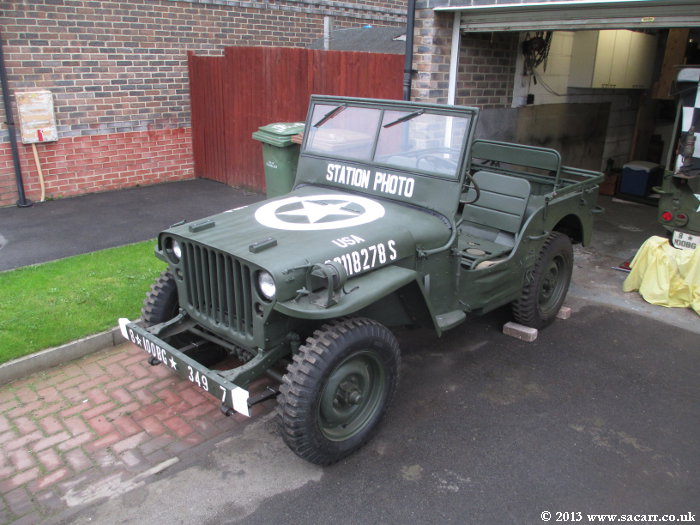
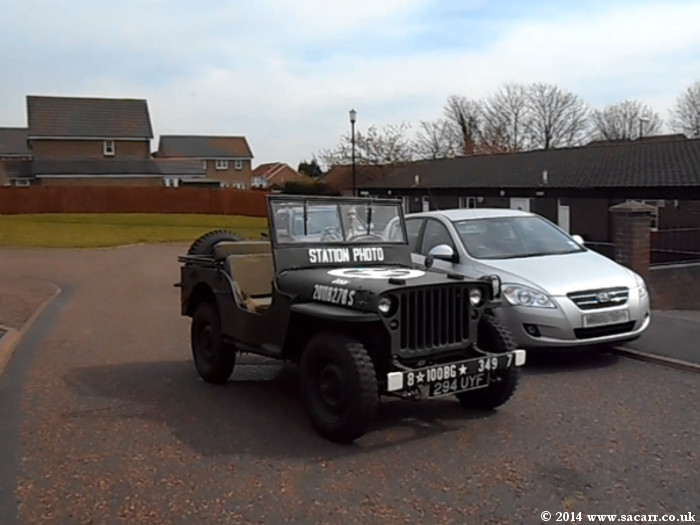
I
couldn't resist another roll out for a picture, even though I was still
waiting for the seat canvasses. With two normal cars and a very large
trailer on the drive, a roll out for a photo isn't an easy proposition,
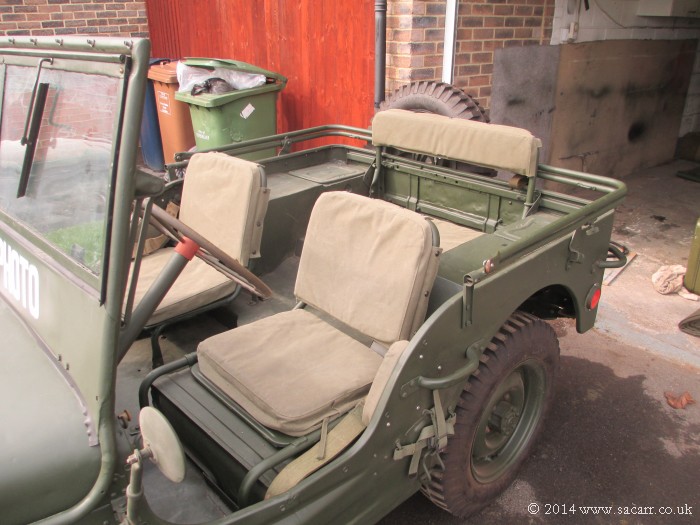
but worth while! It wasn't too much longer before the Worthing canvasses
arrived and were fitted. I didn't bother with a roof as I still had the
original olive drab one from my first Jeep. I had found a cheap,
slightly tatty canvas for that which had been painted checkered, leaving
the green one in good condition. It was nice to see both Jeeps together
again for the first time since the sorry looking wreck arrived.
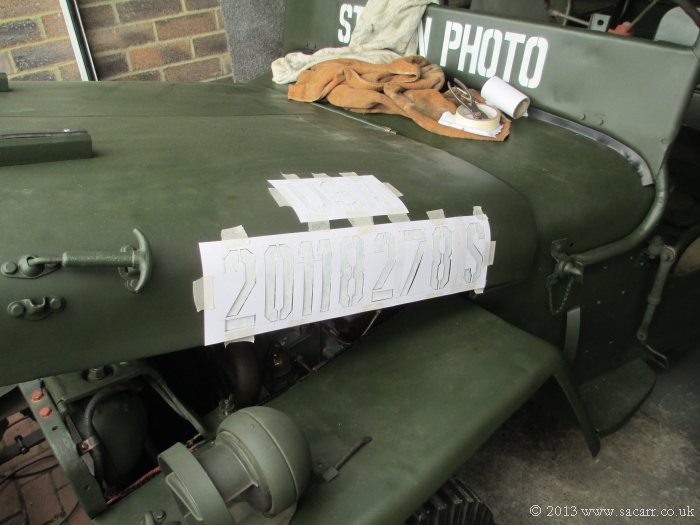
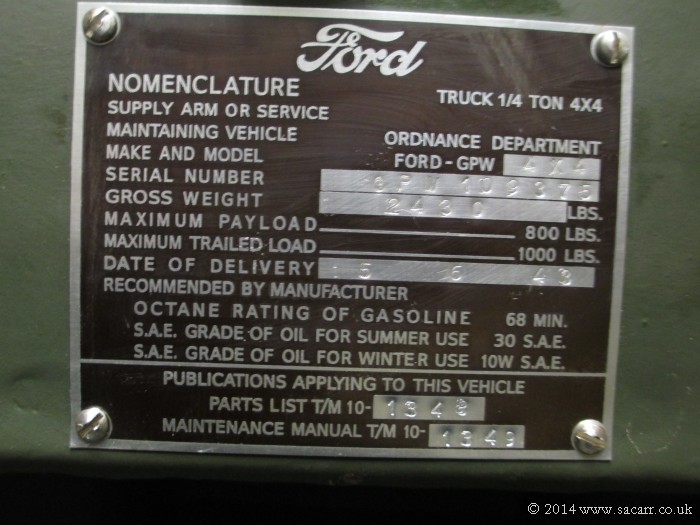
The
original data plates were very badly corroded, right through in places,
but I was still able to make out the chassis number and data of
delivery, our wedding anniversary as it happens! The insurance for my
other two vehicles, was due in mid April, so the Ford was set up to
commence from that date. After getting the log book and registration, I
had some plates made up and got them fitted, and did a few other odds
and ends and checking leading up towards April 16th 2014, the insurance
start date.
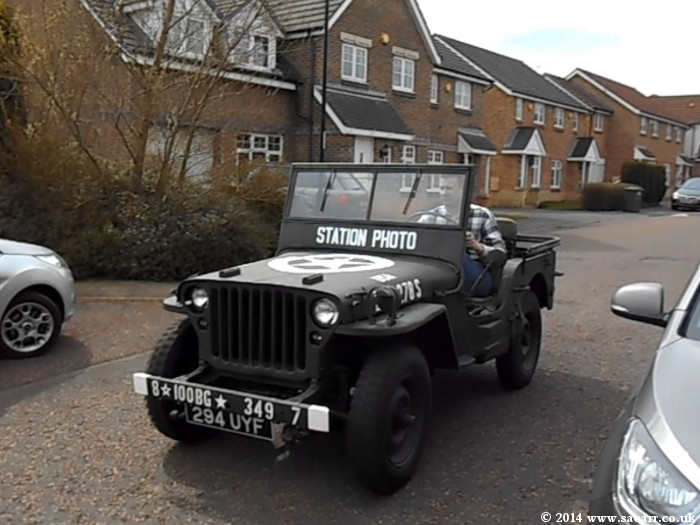
I
spent the morning with the Jeep on blocks, rear wheels clear of the
ground, so I could run it with the wheels spinning and do a bit of
bedding in of the contracting band hand brake. In the afternoon, I did
three short drives totalling 3.4 miles, up and down the street and
around the block gently. The engine has has about two hours running at
various rpm on the drive, but not under load. I also need to build up my
confidence in the mechanics of the vehicle, as currently, every noise
and rattle is a reminder of did I tighten everything up and put it all
back together right! On the 21st, I did another 3 miles to visit George.